Microsoft Entra SSO
How to Set Up Microsoft Entra Single Sign-On (SSO) with Theneo
Microsoft Entra Single Sign-On (SSO) enables your organization to securely access Theneo using your existing Azure Active Directory credentials. This simplifies user management, enhances security, and provides seamless integration for your team.
This guide provides detailed instructions to help administrators configure Microsoft Entra SSO with Theneo.
Microsoft Entra SSO is available only for the Enterprise tier.
Step 1: Initiate Sign-In
To get started with enabling SSO, you'll first initiate the process from Theneo.
- Navigate to the Theneo login page.
- Select "Sign in with Microsoft Azure AD". This will begin the authentication process and redirect you to Microsoft's authentication page.
Step 2: Provide Consent on Behalf of Your Organization
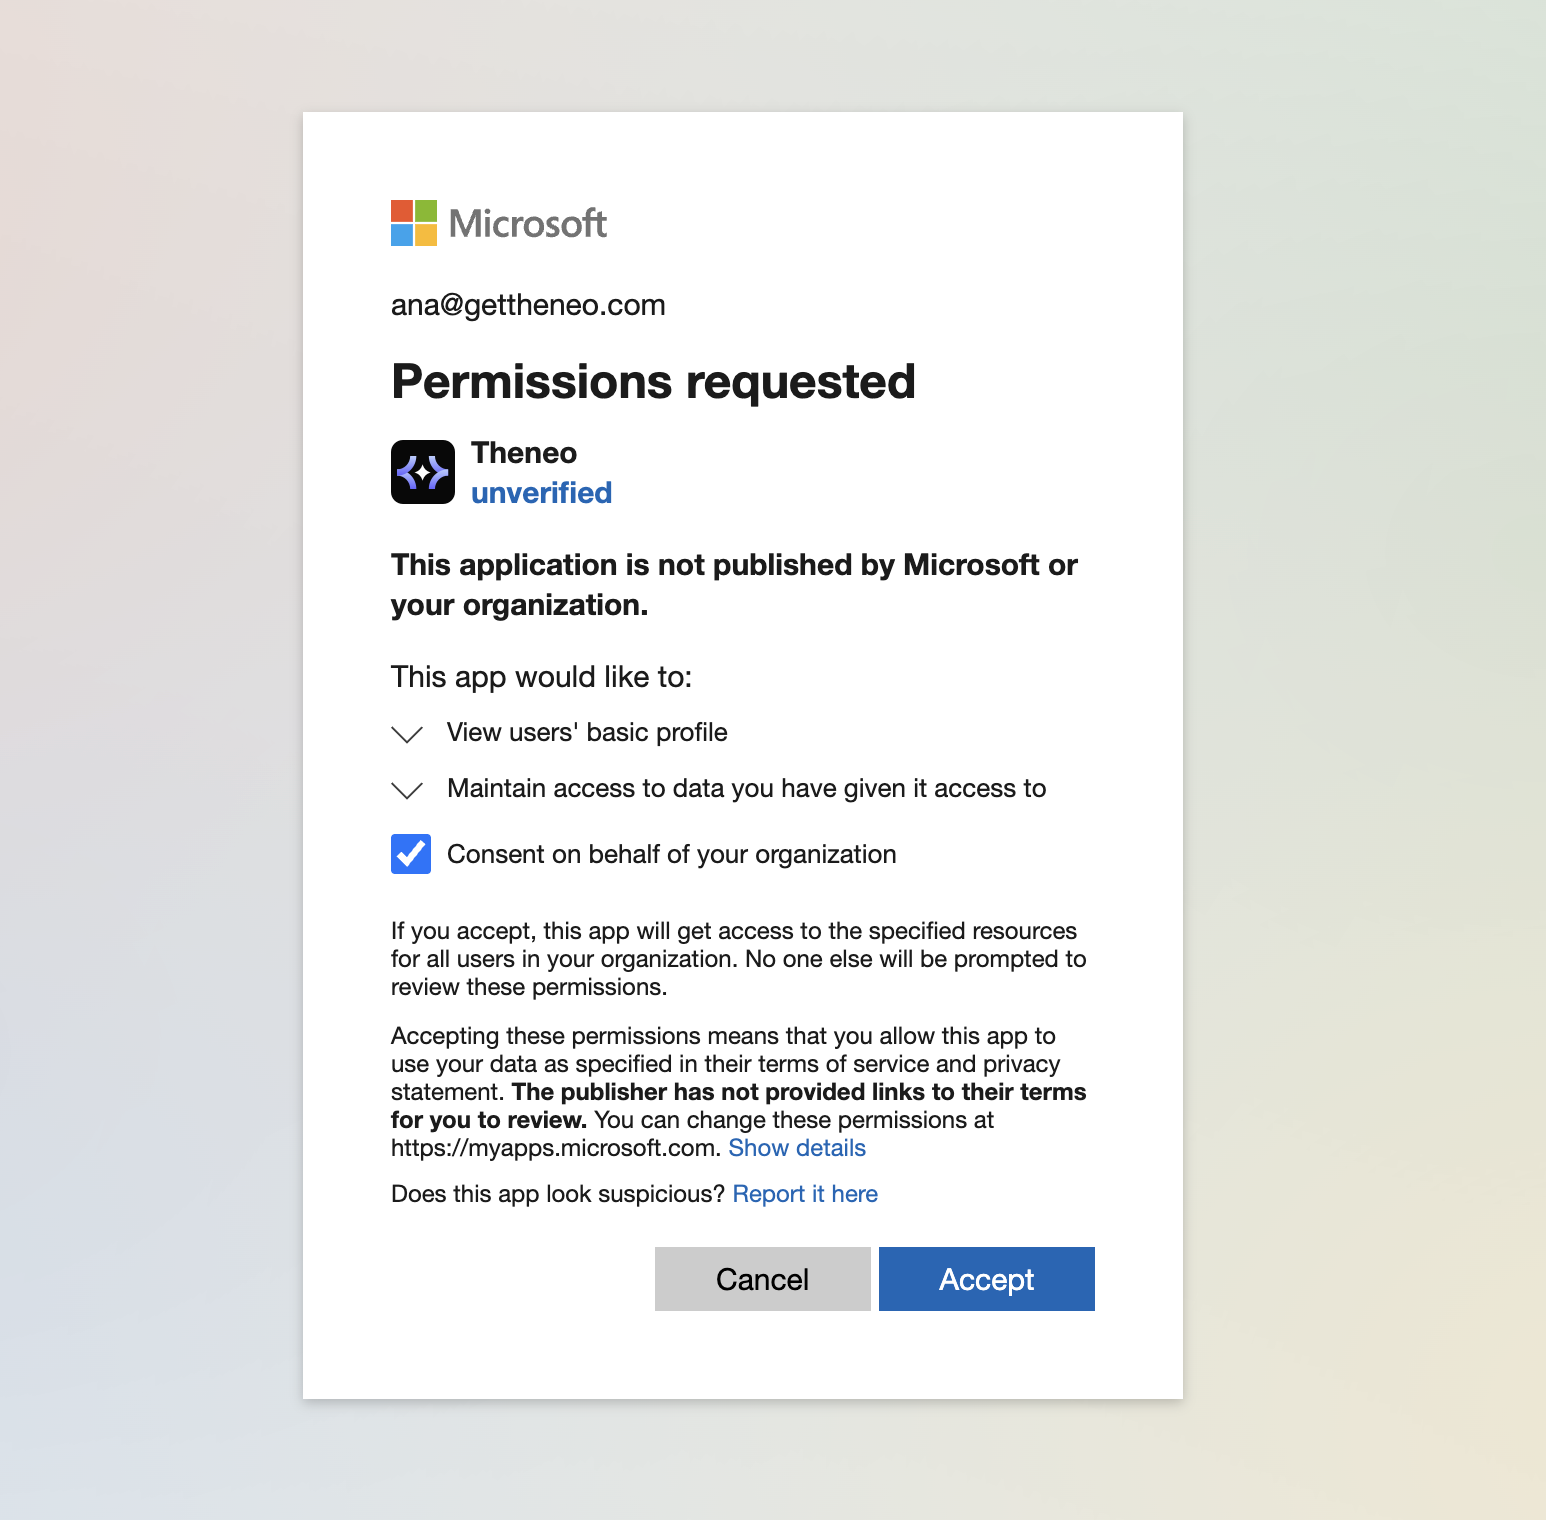
To allow Theneo to integrate securely with your organization's Azure Active Directory, you'll need to grant administrative consent.
- Upon redirection to Microsoft, enter your administrator credentials if prompted.
- You will see a permissions request screen displaying the permissions Theneo is requesting (e.g., viewing your basic profile and maintaining access to data).
- Select the checkbox labeled "Consent on behalf of your organization". This ensures that individual users won't have to consent separately, simplifying the experience for your entire team.
- Click "Accept" to authorize the integration. Microsoft will confirm this authorization and redirect you back to Theneo.
Step 3: Configure Theneo Application Access in Microsoft Entra
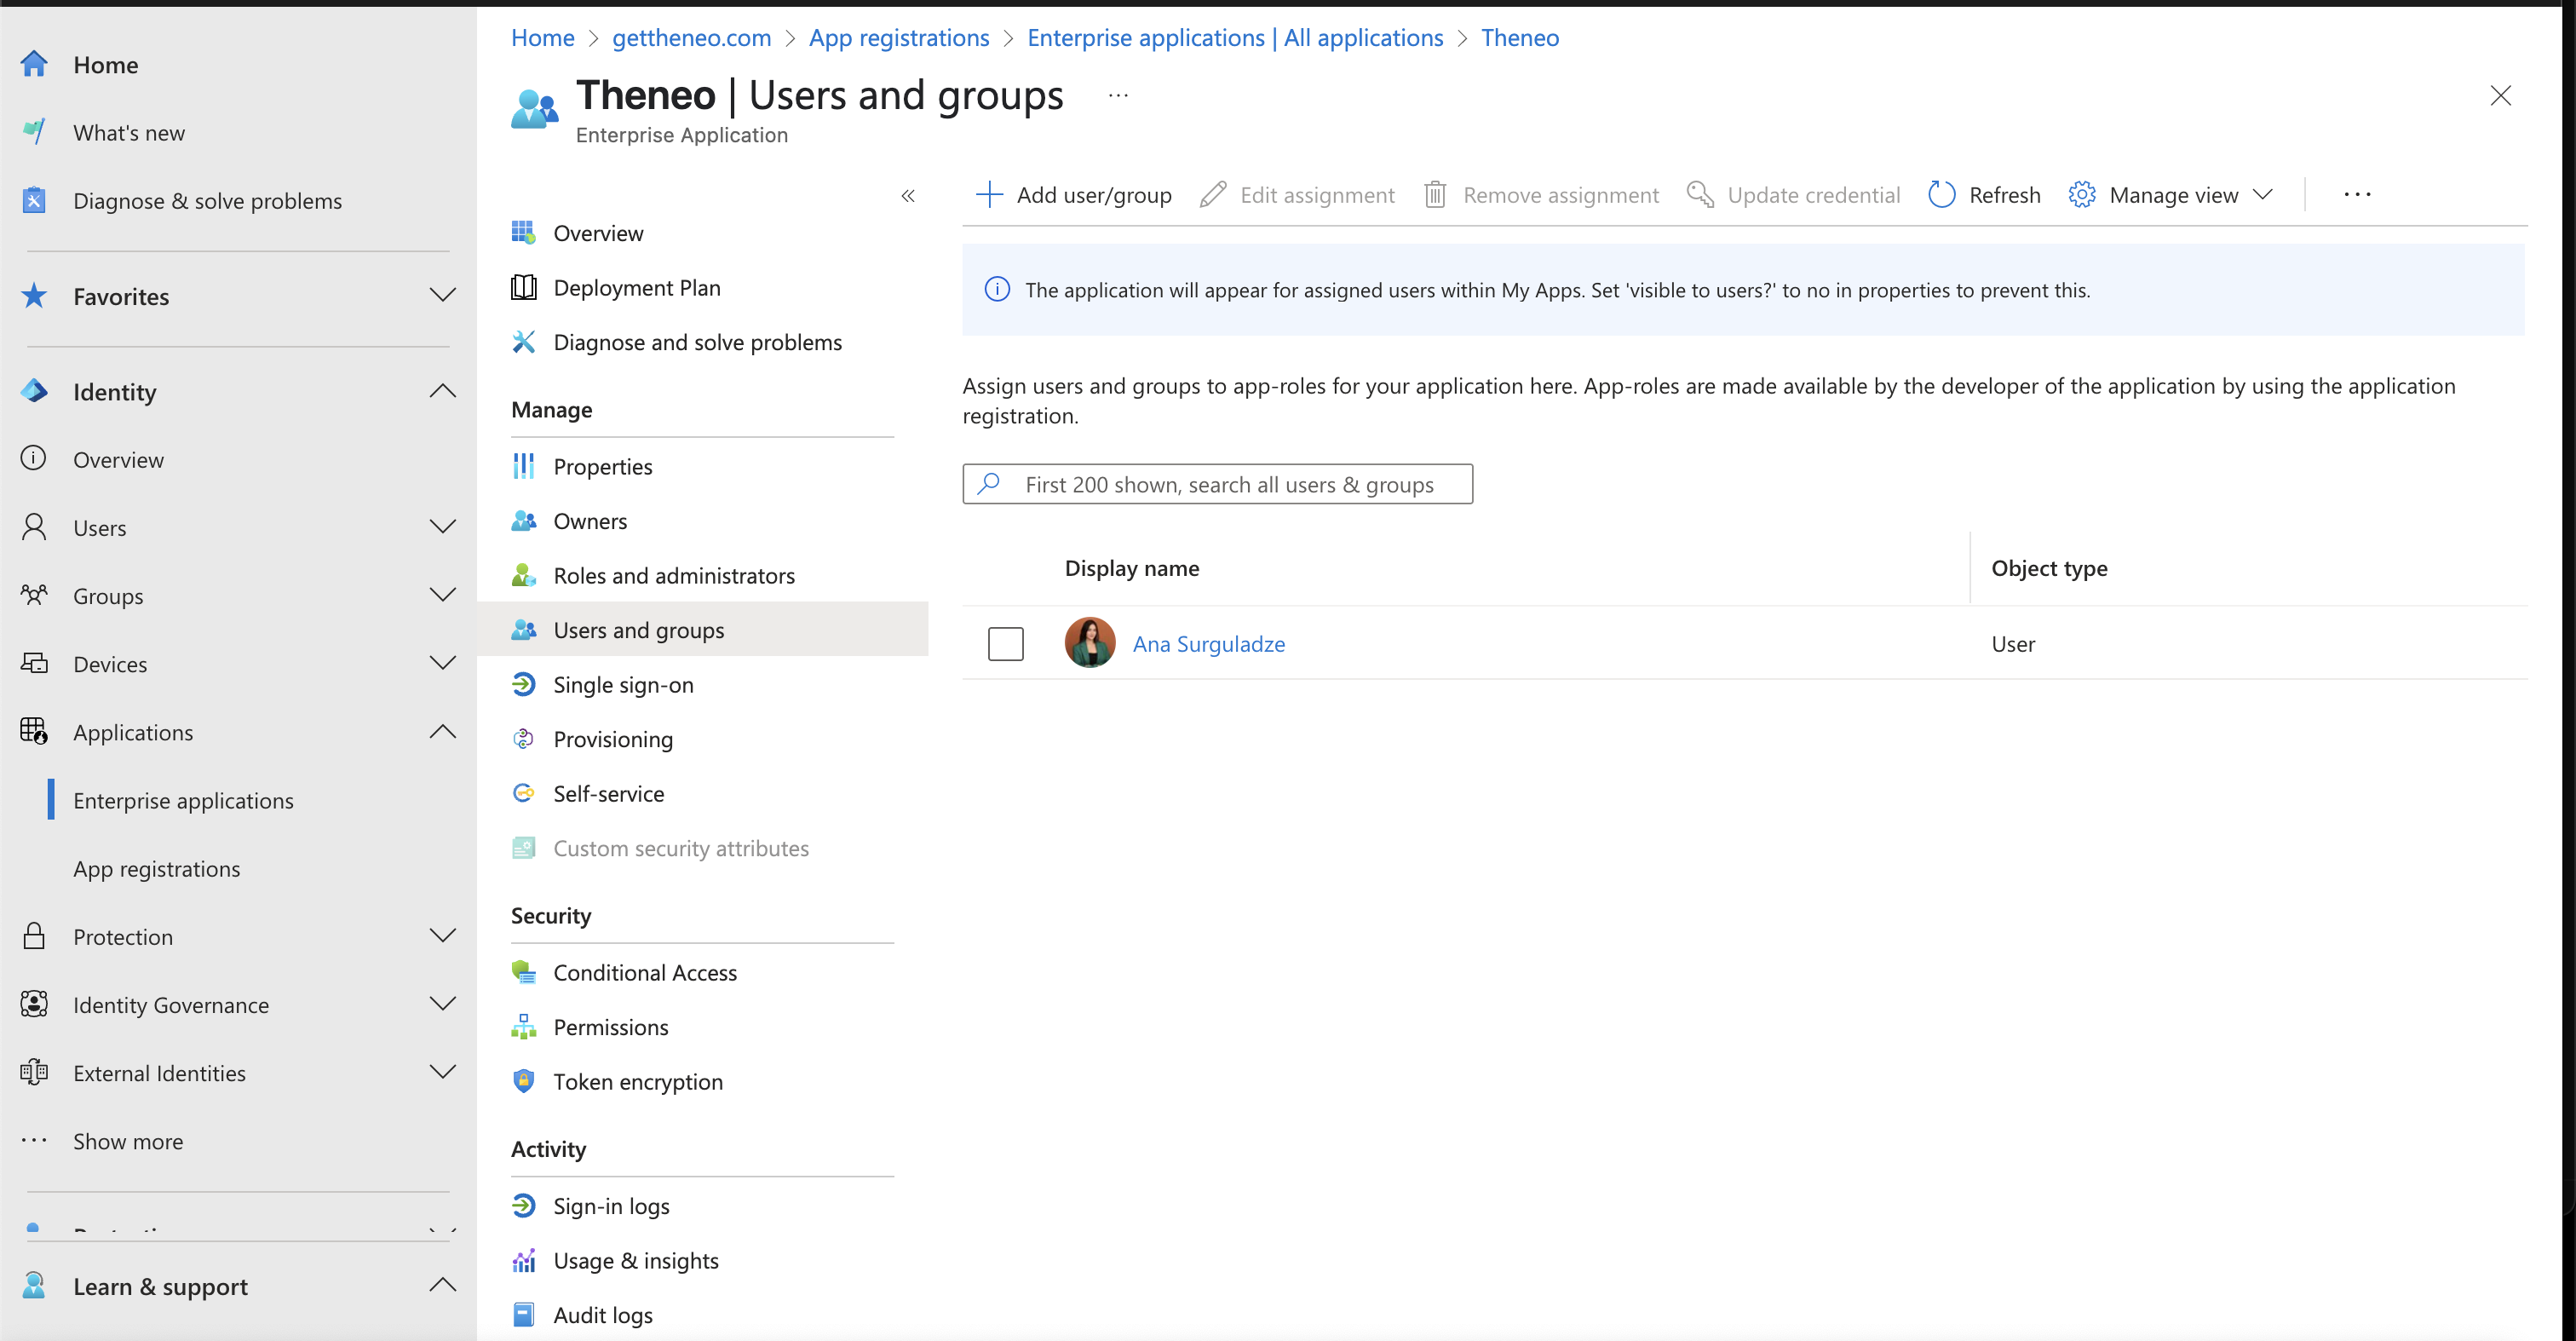
With the initial authorization complete, you need to manage which users or groups can access Theneo.
- Sign in to the Microsoft Entra admin center.
- Navigate to the Enterprise Applications section.
- In the search bar, type "Theneo" and press enter to locate the Theneo application.
- Click on the Theneo application to open its settings page.
- Navigate to "Users and groups" from the sidebar to specify who can access Theneo.
- Click "Add user/group", then select specific users or groups from your Azure AD that need access to Theneo. This allows precise control over who within your organization can use the application.
- After selecting the users/groups, click "Assign" to confirm their access permissions.
Step 4: Verify User Access
It's good practice to verify that the configuration has been successful:
- Instruct assigned users to navigate to Theneo's login page.
- Have them select "Sign in with Microsoft Azure AD".
- Ensure that users can log in successfully and access their Theneo accounts without issues.
Additional Recommendations
- Conditional Access Policies:
- Configure Conditional Access policies within Microsoft Entra to enforce additional security measures such as restricting access based on geographical location, device compliance, or user risk levels.
- Audit Logs and Insights:
- Regularly review the "Sign-in logs" and "Audit logs" in Microsoft Entra. These logs provide valuable insights and help monitor for unusual activity or unauthorized access attempts.
- Self-service Access Management:
- Enable self-service options within Microsoft Entra, allowing users to request access directly, reducing administrative effort and streamlining processes.
By thoroughly following this guide, administrators can successfully set up and manage secure Single Sign-On access to Theneo through Microsoft Entra, significantly simplifying user access management and improving overall security.
On this page
- Microsoft Entra SSO