Access Management
Access management in Theneo allows you to take complete control over who has access to your projects and to what extent they can interact with your documentation. Providing you with granular control over access and permissions, Theneo ensures you can effectively manage your team's involvement while ensuring your project's security.
When you navigate to the Access Management section within a project, you'll find options to change the permission of the document from private to public, and to invite new members. This robust access management system is designed to provide you with flexibility, security, and ease of collaboration.
Public and Private Settings
By default, every project in Theneo is private, meaning that only you, as the project's creator, can view and interact with the documentation. However, Theneo understands that collaboration is key in many instances, and therefore, it allows you to toggle your project's accessibility from private to public.
Making a project public allows anyone with the project's URL to view your documentation. This is particularly useful when you want your API documentation to be accessible to a wide audience, such as your API's user base.
Inviting New Members
With Theneo, you're not working in isolation; you can invite your team members to collaborate on the project. Whether it's developers, product managers, or technical writers, inviting new members to the project is as easy as entering their email addresses and clicking "Enter".
Each invitee will receive an email invitation to view or edit the project based on the permissions you set.
Permission Levels
There are two levels of permissions you can assign to team members: Editor and Viewer (or Guest).
- Editors have the authority to make changes to the project. They can add, modify, or delete sections, update content, manage SEO settings, and perform other edits as needed.
- Viewers, on the other hand, can only view the project. They have access to the published project and can leverage the information but can't make any changes to the content.
Advanced Access Management
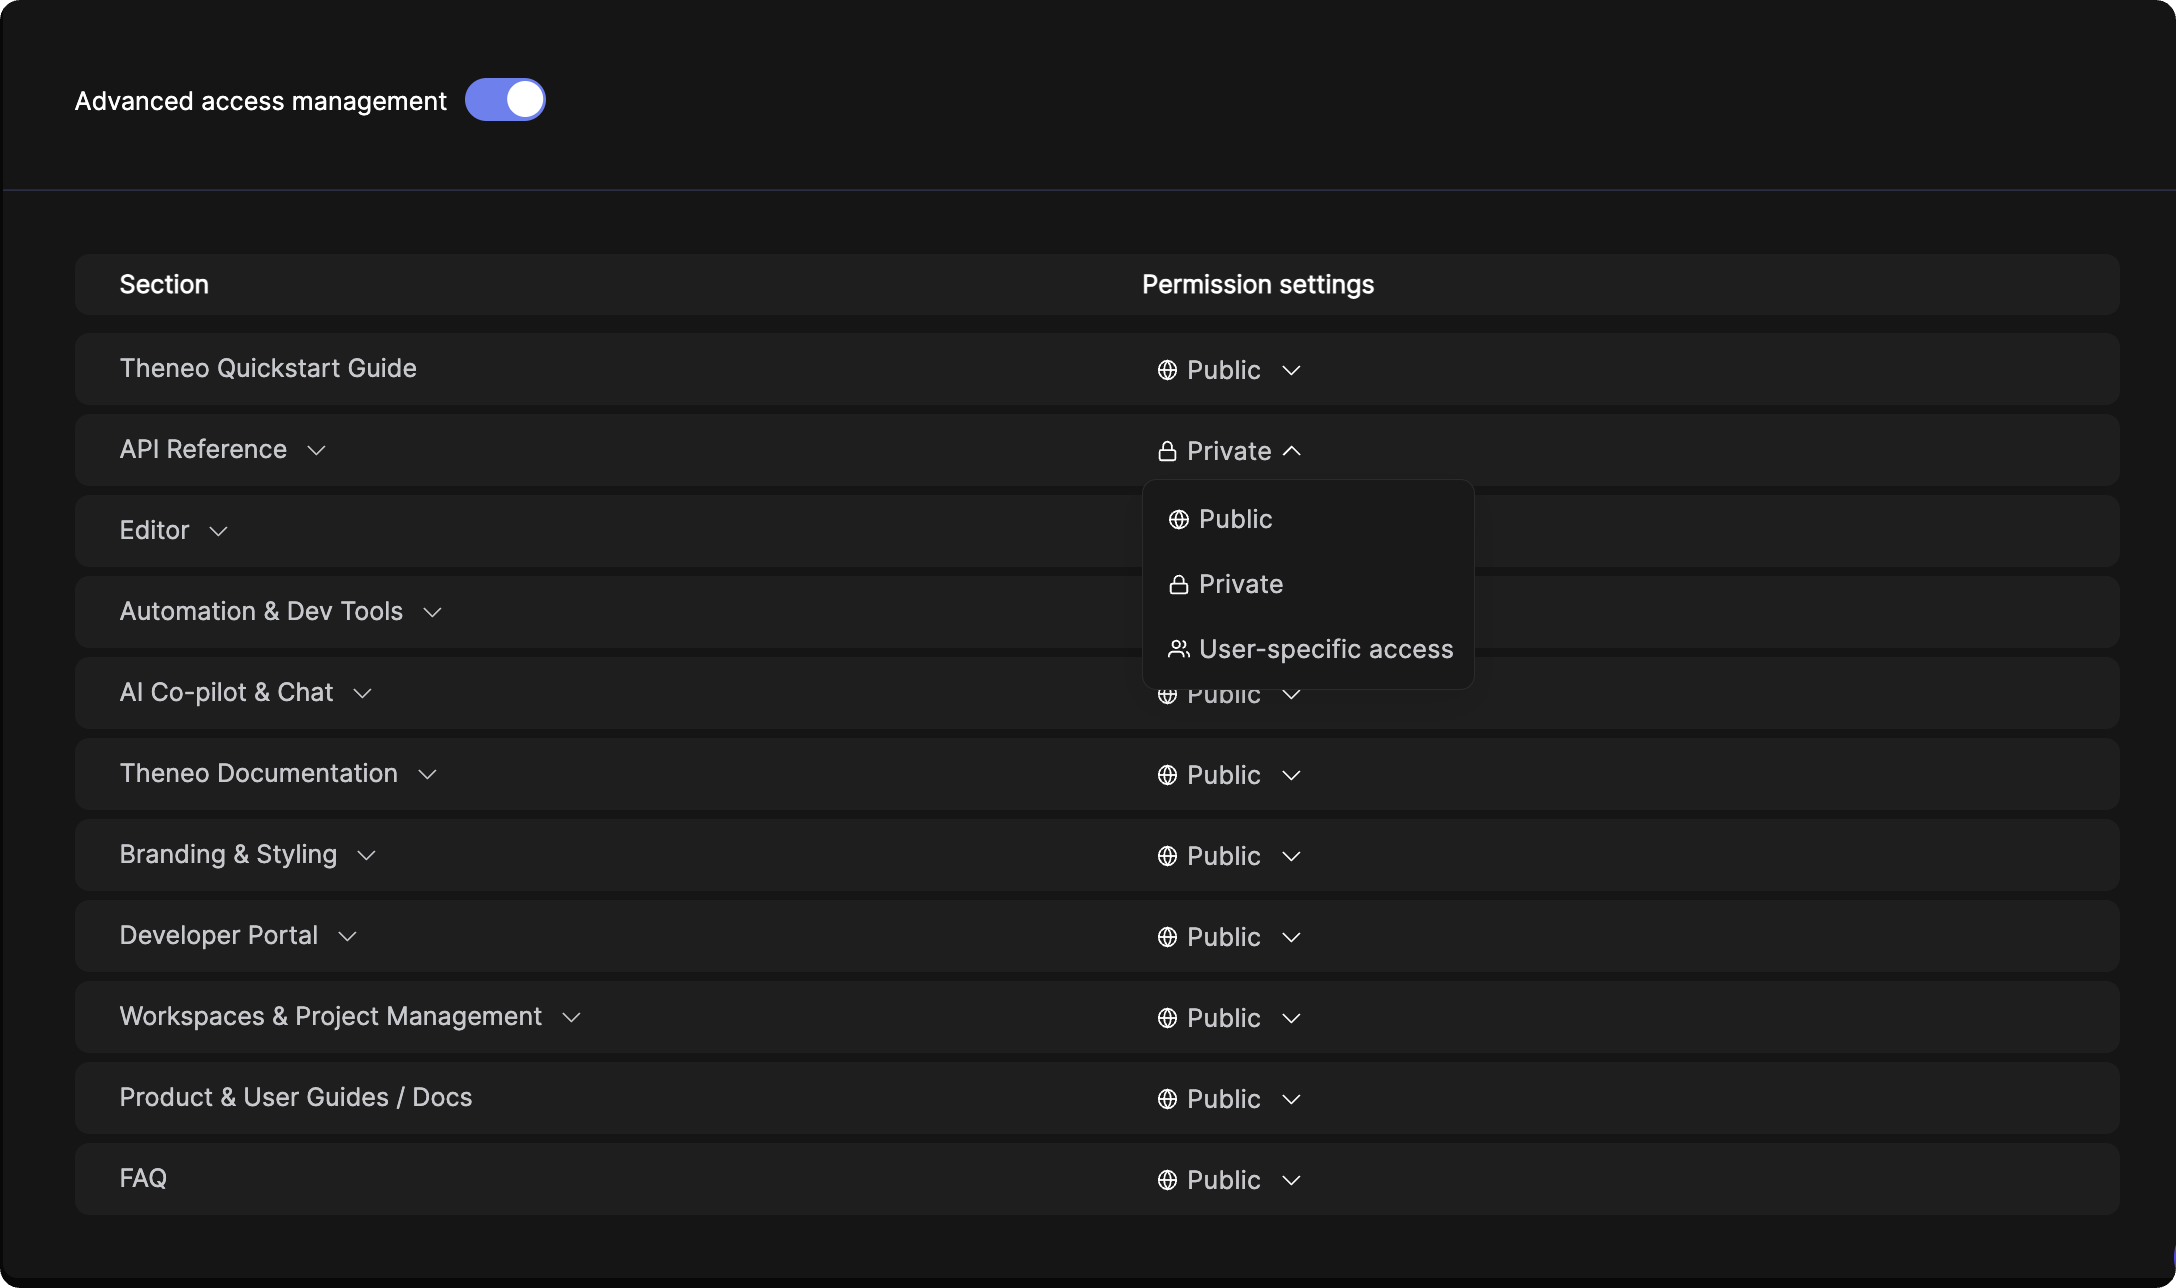
Theneo provides robust access management capabilities, allowing for both project-wide and section-specific access controls. This ensures that only authorized users can view or edit specific sections or subsections within a project. Here's a detailed guide on how to manage access at these granular levels.
Before managing user-specific access, ensure the user is invited to the project.
Once users have access to the project, you can refine their access to specific sections
- Within the project access management, navigate to the advanced access management area.
- Select the section or subsection you want to manage.
- Set Access Permissions:
- For each section or subsection, you will have the option to set it as public, private, or user-specific.
- Select the desired access level.
- Invite Users to Sections:
- For user-specific sections, you will need to invite users to those specific sections.
- Enter the email addresses of the users who should have access to the section.
- Confirm the invitations, making the section visible only to these users.
Password-Based Access for Private Projects
Quick Access to Password-Protected Projects with Custom Domains allows you to grant access to multiple users without inviting each one individually through access management.
Prerequisites
Before proceeding, ensure the following prerequisites are met:
- Project Privacy: The project must be set to private.
- Custom Domain: The project should have a custom domain configured. For more information on setting up a custom domain, click here.
Step-by-Step Instructions
Step 1: Navigate to Project Access Management
- Open your project dashboard.
- Locate and click on the Access Management tab.
Step 2: Verify Project Settings
- Ensure the project is set to Private.
- Confirm that the project has a Custom Domain set up.
Step 3: Set a Password for Easy Project Access
- Within the Access Management section, locate the field labeled Set Password for Easy Project Access.
- Enter a secure password in the provided field.
- Click on the Set Password button.
Step 4: Share the Project URL and Password
- Copy the project URL with the custom domain.
- Note: This functionality will not work if you share the project URL using Theneo's domain.
- Share the custom domain URL and the password with your customers.
Step 5: Accessing the Project
- Users will open the shared URL.
- They will be prompted to enter the project password.
- Once the correct password is entered, the project content will be accessible.
Troubleshooting
Common Issues
- Incorrect URL: Ensure the URL shared is the one with the custom domain and not Theneo's domain.
- Forgotten Password: If users are unable to access the project due to a forgotten password, reset the password through the Access Management section and share the new password.
By providing different access levels, Theneo ensures that you can effectively manage your team and project resources, keeping your project's integrity intact while fostering productive collaboration.
Access Management in Theneo is simple yet powerful, designed to facilitate seamless collaboration while maintaining control over who can access and modify your technical documentation.
On this page
- Access Management