Get Started

Theme switcher

Quickstart

Get started with Theneo and publish your first API docs in minutes.

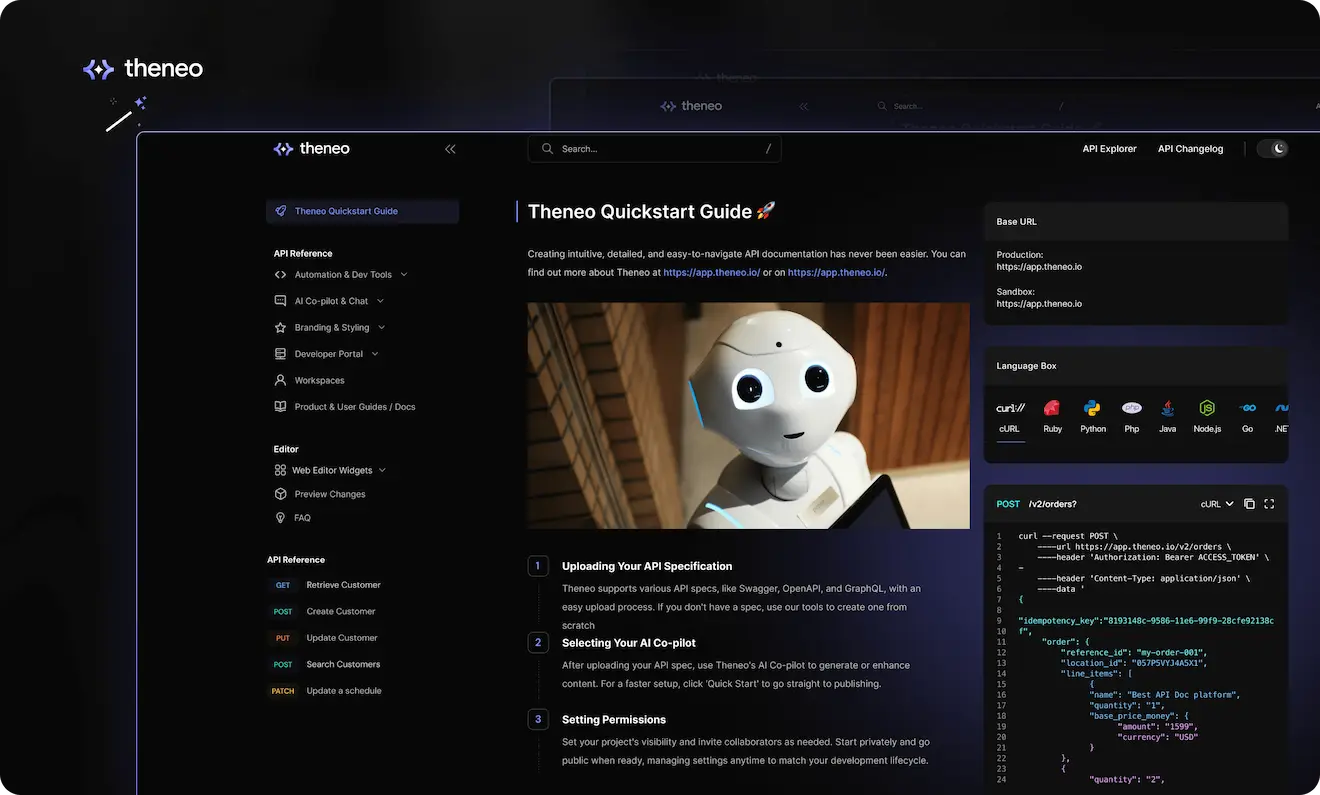
Creating intuitive, detailed, and easy-to-navigate API documentation has never been easier. Theneo streamlines every step of the process, ensuring that your documentation is not only comprehensive but also interactive and user-friendly. Here's how you can quickly set up your project in Theneo.

Getting Started

To create and publish documentation in Theneo, you first need to create a Theneo account. If you don’t have an account yet, you can sign up for free here.

Create Your First Doc

When you log into Theneo, start by adding a new project from the homepage. Your project could be an API reference, a developer guide, or any type of documentation you need. Give your project a title, select the appropriate workspace, and you're on your way.

Uploading Your API Specification

Theneo accommodates a wide array of API specifications, making it easy to get started regardless of whether you have an existing spec or not. If you're equipped with Swagger, OpenAPI, GraphQL, or another format, the upload process is designed to be straightforward and efficient.

In case you don't have a spec ready, Theneo offers tools to help you create one from scratch. Use our intuitive interface to define your API endpoints directly within the platform. For additional guidance on creating or importing your spec and ensuring format compatibility, check out our guide.

If you do not have a spec, do not worry you can define that in Theneo as well, for more info click here.

Selecting Your AI Co-Pilot

Once your API specification is uploaded, you can harness the power of Theneo's AI Co-pilot to enrich your content. Decide whether you want the AI to fully generate the content, enhance what you've already created, or if you prefer to proceed without AI assistance. If you're looking to streamline the setup, simply click on "Quick Start" to bypass the customization and move directly to publishing.

Setting Permissions and Fine-Tuning Your Project

Set your project’s visibility and invite collaborators according to your workflow needs. With Theneo, you can start with a private project and go public when you're ready, seamlessly inviting others to contribute. Manage these settings at any time to fit your project’s development lifecycle.

You can change project level permission and even set up advanced access management later in the project settings.

Publish

Utilize Theneo's editing suite for final adjustments before publishing. Preview to ensure everything is perfect and publish to make your documentation available to users. It’s documentation made simple, yet powerful and comprehensive

Optional steps

Was this section helpful?

What made this section unhelpful for you?

On this page
  • Quickstart

API Import

Theneo provides a robust and versatile solution for managing your API documentation. Whether you're starting from scratch or updating existing documentation, our platform supports a wide range of API formats and import methods to streamline your workflow.


Supported API Formats & Collections

Theneo supports the following API formats and specification types:

  • REST
  • SOAP
  • GraphQL
  • Async APIs

We also support various API specification collections, ensuring smooth migration and integration with your existing tooling.

Importing Your API Documentation

1. Getting Started with Importing

If you do not have existing documentation in Theneo, you can begin by importing your API spec:

  • From the Theneo Dashboard
  • Using Theneo CLI (for local environment or automation)

You can easily migrate and unify your API documentation into Theneo using either method.


2. Updating Existing Projects in the Editor

If you already have a project in Theneo and want to update the API spec, you can do this directly from the Theneo Editor:

Steps:

  1. Open the Editor and navigate to the Endpoints tab (above the left-side menu).
  2. Click "Import Collection".
  3. Choose your preferred import method.

Import Options Explained:

Option
Description

Import Endpoints Only

Imports only the endpoints from the uploaded file, without affecting your content.

Append Sections

Adds new content and endpoints from the uploaded file while keeping existing ones untouched.

Merge Sections

Combines new and existing documentation.

You’ll choose how to handle conflicts:

  • Keep old or new section descriptions
  • Keep old or new parameter descriptions

Overwrite Sections

Replaces existing content and endpoints with those from the uploaded file. Use with caution.

You can upload your spec via:

  • File
  • Link
  • Postman Collection
  • Raw Text

Once confirmed, the changes will be reflected directly in the Editor.

Automating Imports: CLI & GitHub Actions

For developers preferring automation and CI/CD workflows, Theneo supports imports via:


A. GitHub Actions Integration

Automate documentation updates with GitHub:

Setup:

  1. Create a workflow file named Theneo.yml in your repository under .github/workflows/.

Example: Theneo.yml

YAML
name: Update Documentation on: pull_request: branches: - main jobs: update-doc: name: Update Theneo Documentation runs-on: ubuntu-latest steps: - run: echo "🎉 The job was automatically triggered by a ${{ github.event_name }} event." - name: Checkout uses: actions/checkout@v4 - name: Setup Node.js uses: actions/setup-node@v4 with: node-version: "18" - name: Update Documentation on Theneo uses: Theneo-Inc/api-documentation@1.8.0 with: FILE_PATH: doc/api.yml PROJECT_SLUG: <project_slug> VERSION_SLUG: <version_slug> WORKSPACE_SLUG: <workspace_slug> SECRET: ${{secrets.SECRET}} AUTO_PUBLISH: true IMPORT_OPTION: merge PARAMETER_DESCRIPTION_MERGE_STRATEGY: keep_new SECTION_DESCRIPTION_MERGE_STRATEGY: keep_old INCLUDE_GITHUB_METADATA: true

For more guidance, visit here.

B. Theneo CLI Integration

Use Theneo CLI for advanced import control.

Basic Command

theneo project import [options]

Options:

Option
Description

--project

Specify the project slug

--file or --link

Import via file path or URL

--postman-api-key /

--postman-collection

Import via Postman API

--import-type

Choose from: endpoints, overwrite, append, or merge

--publish

Auto-publish after import

--workspace

Workspace slug

--projectVersion

Version slug

--keepOldParameterDescription

Keep old parameter descriptions during merge

--keepOldSectionDescription

Keep old section descriptions during merge

Example Command

Bash
Usage: theneo project import [options] Import updated documentation into Theneo using file, link or postman collection Note: Published document link has this pattern: https://app.theneo.io/<workspace-slug>/<project-slug>/<version-slug> Options: --project <project-slug> Specify the project slug to import updated documentation in -f, --file <file> API file path to import (eg: docs/openapi.yml) --link <link> API file URL to create project using it --postman-api-key <postman-api-key> Postman API Key (env: THENEO_POSTMAN_API_KEY) --postman-collection <postman-collection> Postman collection id, you can use multiple times --import-type <import-type> Indicates how should the new api spec be imported (choices: "endpoints", "overwrite", "append", "merge") --publish Automatically publish the project (default: false) --workspace <workspace-slug> Workspace slug, where the project is located --projectVersion <version-slug> Project version slug to import to, if not provided then default version will be used --keepOldParameterDescription Additional flag during merging import option, it will keep old parameter descriptions --keepOldSectionDescription Additional flag during merging import option, it will keep old section descriptions --profile <string> Use a specific profile from your config file. -h, --help display help for command

For more guidance, visit here.

Theneo offers flexible import options for all types of users—from product managers updating documentation manually to developers automating the process with GitHub or CLI. Whether you're starting from scratch or maintaining existing documentation, Theneo makes it easy to import, manage, and publish your API specs with confidence.

Was this section helpful?

What made this section unhelpful for you?

On this page
  • API Import

Other Docs & User Guides

Theneo isn't just for API documentation—it also empowers teams to create non-API documents, such as technical guides, onboarding docs, tutorials, help centers, product manuals, and more.


Getting Started from the Theneo Dashboard

  1. Login to Theneo Dashboard Go to Theneo Dashboard and sign in with your workspace credentials.
  2. Create a New Project Click on "Create Project" from the dashboard.
  3. Select “Other Docs” On the project creation page, choose the "Other Docs" option instead of an API format.
  4. Pick Your Sections You’ll be prompted to choose section templates like:
  • Introduction/Overview
  • Prerequisites & Installation
  • Sample Code & Tutorials
  • Supported Libraries
  • Usage & Integration
  • Troubleshooting & Support

You can customize, rename, and reorder these sections later.


Editing Your Docs in Theneo

Once the project is created, you have two ways to start working on your documentation:

A. Use the Theneo Editor

Enjoy a Notion- and Figma-like editing experience with:

  • Rich text formatting
  • Drag & drop content blocks
  • Real-time editing and live preview
  • Easy collaboration with teammates

Everything you need to build modern documentation without writing a single line of code.


B. Import Markdown Using Theneo CLI

Prefer to write in Markdown and keep content locally? You can import Markdown files into Theneo using the CLI.

CLI Usage

theneo import [options]

Options
Option
Description

--project <project-slug>

The slug of the project you want to update

--workspace <workspace-slug>

The workspace slug to use (defaults to your primary workspace)

--dir <directory>

Path to the directory containing your generated Markdown

--publish

Auto-publish the imported content (optional)

--projectVersion <version-slug>

The version slug of the project (optional)

--profile <string>

Use a specific CLI profile if configured

-h, --help

Show help and usage information

Example

Bash
Usage: theneo import [options] Update theneo project from generated markdown directory Options: --project <project-slug> project slug --workspace <workspace-slug> Enter workspace slug where the project should be created in, if not present uses default workspace --dir <directory> Generated theneo project directory --publish Automatically publish the project (default: false) --projectVersion <version-slug> Version slug --profile <string> Use a specific profile from your config file. -h, --help display help for command

For more information on setting up Theneo CLI, visit here


Recommended Layout: Single Page Template

For guides and other non-API docs, such as:

  • Tutorials
  • Onboarding walkthroughs
  • Step-by-step how-tos

We highly recommend using the Single Page Template.

Why Choose the Single Page Template?

Feature
Benefit

Modular Layout

Each section appears on its own page for cleaner, more intuitive navigation.

Improved Performance

Only the requested page loads, speeding up performance — great for large docs.

Clear Navigation & URLs

Each section gets a unique URL, perfect for deep linking and sharing.

Optimized for Guides

Best suited for linear content such as step-by-step instructions or tutorials.

Better Readability

Reduces scrolling fatigue and offers a more focused, distraction-free experience.

To learn more about this layout and how to activate it for your project, visit here

Was this section helpful?

What made this section unhelpful for you?

On this page
  • Other Docs & User Guides

Themes & Templates

In Theneo, you can fully customize the appearance of your docs to align with your company’s branding—no coding required.

To make styling easy and consistent, Theneo provides a set of predefined themes you can apply instantly. These themes control elements like:

  • Fonts & typography
  • Colors (text, background, buttons)
  • Header and sidebar styles
  • Accent colors and UI highlights

Branding Customization Options

You can further tailor your documentation by adjusting:

  • Primary & secondary colors
  • Logo & favicon
  • Font styles
  • Code block styling
  • Custom CSS/JS (Advanced)

Choosing a Documentation Template

Theneo supports two layout templates for structuring your documentation: Single Page Template and Continuous Scrolling. You can choose the one that best fits your content and user experience goals.

Single Page Template (Recommended for Guides & Tutorials)

This layout breaks your documentation into modular sections.

Best for:

  • Step-by-step guides
  • Tutorials
  • Onboarding walkthroughs
  • Help center-style docs

Benefits:

  • Cleaner navigation
  • Improved performance (loads one section at a time)
  • Unique URLs for deep linking
  • Better readability and user focus

💡 Ideal for users creating non-API docs and guides.

Footer Configuration

To customize the footer in the Single Page Template, follow these steps:

  1. Navigate to Branding Settings from your Theneo dashboard.
  2. Go to the General Settings tab.
  3. Open the Footer Links section.
  4. Add, edit, or remove footer content — including:
  • Social links
  • Corporate URLs
  • Custom web links relevant to your documentation

This allows you to align your doc’s footer with your brand and link out to key resources for your users.

Continuous Scrolling Template

This is the traditional doc style where all content flows on one long page.

Best for:

  • Reference documentation
  • Technical specs
  • API overviews and lists

Benefits:

  • Seamless vertical reading
  • Great for quick searching via browser
  • Simpler document flow for smaller projects

Switching Templates

You can change the template at any time in your Project Settings:

  1. Go to Project Settings > Features
  2. Turn the Single Page Template toggle on or off

There are a variety of themes and templates to choose from — giving you full control over how your docs look and feel.

Solid

Roboto

Bloom

Single Page Template

Continues Scrolling

Was this section helpful?

What made this section unhelpful for you?

On this page
  • Themes & Templates

Migration

Migrating to Theneo is fast, simple, and fully supported.

Whether you're coming from platforms like Swagger, Postman, ReadMe, Docusaurus, or any other API/documentation tool — Theneo makes it easy to bring your content over and elevate it with our powerful features.


Easy Migration Process From

Swagger

Postman

Readme

Docusaurus

You can migrate:

  • API specs (OpenAPI, Swagger, Postman Collections, etc.)
  • Markdown content (guides, tutorials, onboarding flows)
  • Full documentation projects from other platforms

Migration Assistance & Best Practices

As part of our Annual Growth Package, the Theneo team offers:

  • End-to-end migration assistance
  • Personalized suggestions to improve your docs using Theneo’s smart tools
  • Optimization support for readability, structure, and performance

Need Help Migrating?

For custom migration cases or platform-specific needs, contact us at hello@theneo.io — we’ll evaluate your current setup and provide tailored migration assistance.

Was this section helpful?

What made this section unhelpful for you?

On this page
  • Migration

Markdown support

Theneo provides robust markdown support both within the editor and through CLI-based markdown imports, enabling flexible documentation creation and management workflows.

In-Editor Markdown Support

Standard Markdown Formatting

Theneo's editor supports all standard markdown formatting including:

  • Headers (H1-H6)
  • Bold and italic text
  • Inline code and code blocks with syntax highlighting
  • Lists (ordered and unordered)
  • Links and images
  • Tables
  • Blockquotes
  • Horizontal rules

Theneo Custom Widgets

Beyond standard markdown, Theneo provides custom widgets that enhance API documentation with interactive elements. These widgets enable rich content presentation directly within your markdown files.

Code Blocks with Enhanced Features

Markdown
<CodeBlock attributes='{"isFitToPage":true,"style":{},"lang":"bash","label":"Bash"}'>
<CodeLine>npm install -g @theneo/cli@latest</CodeLine>
</CodeBlock>

Interactive Accordions

Plain text
<Accordion attributes='{"style":{"width":"100%"}}'>
<AccordionItem title="Authentication" iconUrl="">
<p>Your authentication content here</p>
</AccordionItem>
</Accordion>

Callout Blocks

Plain text
<Callout attributes='{"isFitToPage":true,"dataType":"info","style":{"width":"100%"}}'>
Important information for your users
</Callout>

These widgets can be combined with standard markdown to create comprehensive, interactive API documentation that enhances developer experience.


Importing Markdown Folders

Theneo CLI provides powerful capabilities for managing documentation through markdown files, enabling version control and collaborative workflows.

Installation

Plain text
npm install -g @theneo/cli@latest

Project Structure Requirements

To import markdown folders into Theneo, your project must follow a specific structure:

Plain text

Configuration Files

theneo.json - Project Structure Definition

The theneo.json file defines the overall structure and hierarchy of your documentation:

Plain text
{
"name": "Your API Documentation",
"baseUrl": "https://api.yourdomain.com",
"sections": [
{
"name": "Introduction",
"slug": "introduction",
"icon": "6",
"isHeader": false
},
{
"name": "Getting Started",
"slug": "getting-started",
"isHeader": true,
"children": [
{
"name": "Authentication",
"slug": "getting-started/authentication",
"icon": "5"
}
]
},
{
"name": "API Reference",
"slug": "api-reference",
"isHeader": true,
"children": [
{
"name": "Customer Management",
"slug": "api-reference/customer-management",
"children": [
{
"name": "Create Customer",
"slug": "api-reference/customer-management/create-customer"
}
]
}
]
}
]
}

section.json - API Endpoint Definition

For sections containing API endpoints, the section.json file defines request and response specifications:

Plain text
{
"endpoints": {
"method": "POST",
"path": "/customers"
},
"request": {
"contentType": "application/json",
"body": [
{
"name": "given_name",
"description": "The first name of the customer",
"isRequired": true,
"valueType": "string",
"value": "John"
},
{
"name": "email_address",
"description": "The email address of the customer",
"isRequired": true,
"valueType": "string",
"value": "john@example.com"
}
],
"header": [
{
"name": "Authorization",
"description": "Bearer token for authentication",
"isRequired": true,
"valueType": "string",
"value": "Bearer <access_token>"
}
]
},
"responses": [
{
"statusCode": 200,
"description": "Successful response",
"contentType": "application/json",
"body": [
{
"name": "customer",
"description": "The created customer object",
"valueType": "object"
}
]
}
]
}

For sections without API endpoints (like introductory content), section.json can be an empty object {}.

CLI Commands for Markdown Management

Creating a New Project from Markdown

Plain text
theneo create --dir ./your-documentation --name "API Documentation" --workspace your-workspace

Importing/Updating Existing Project

Plain text
theneo import --dir ./your-documentation --project your-project-slug --workspace your-workspace

Exporting Project as Markdown

Plain text
theneo export --project your-project-slug --dir ./exported-docs

Best Practices

  1. Version Control: Keep your markdown documentation in Git for version tracking and collaboration
  2. Consistent Structure: Maintain the required folder structure for seamless imports
  3. Modular Organization: Organize endpoints logically within nested folders
  4. Descriptive Names: Use clear, kebab-case slugs for sections and endpoints
  5. Complete Metadata: Ensure all section.json files contain complete API specifications
  6. Regular Sync: Use CI/CD pipelines to automatically sync documentation updates

Example Workflow

  1. mkdir api-docs && cd api-docstouch theneo.json
  2. mkdir -p api-reference/customersecho "# Customer Management API" > api-reference/customers/index.mdecho '{}' > api-reference/customers/section.json
  3. theneo login --token your-api-keytheneo create --dir . --name "My API Docs" --publish
  4. # Make changes to your markdown filestheneo import --dir . --project your-project-slug --publish

Advanced Features

AI-Powered Description Generation

When importing documentation, leverage AI to automatically generate or enhance descriptions:

Plain text
theneo project create --file ./openapi.json --generate-description fill

Options:

  • fill: Add descriptions where missing
  • overwrite: Replace all existing descriptions
  • no_generation: Skip AI generation (default)

Multi-Environment Support - Only for Enterprise accounts

Use profiles for different environments:

Plain text
theneo login --profile production --token prod-api-key
theneo import --dir . --project api-docs --profile production

Working with Complex API Structures

For complex APIs with nested resources, organize your folder structure to mirror your API architecture:

Plain text

This structure translates to:

  • /customers - Create Customer
  • /customers/{id} - Retrieve Customer
  • /customers/{id}/orders - List Customer Orders

Troubleshooting

Common Issues and Solutions

  1. Import fails with structure error:
    1. Verify theneo.json exists in root directory
    2. Ensure all section slugs match folder names exactly
    3. Check that each section folder contains index.md and section.json
  2. API endpoints not appearing:
    1. Confirm section.json contains valid endpoint configuration
    2. Validate JSON syntax in all configuration files
    3. Ensure method and path are correctly specified
  3. Markdown rendering issues:
    1. Use proper escaping for special characters
    2. Verify custom widget syntax matches documentation
    3. Test widgets individually before combining
  4. Authentication errors:
    1. Confirm API key is valid: theneo login --token your-api-key
    2. Check workspace permissions
    3. Verify profile configuration if using multiple environments

Migration Guide

From Static Markdown to Theneo

If you have existing markdown documentation, follow these steps to migrate:

  1. Analyze current structure: Map your existing documentation to Theneo's section hierarchy
  2. Create theneo.json: Define your documentation structure
  3. Reorganize files: Move markdown files into the required folder structure
  4. Add section.json files: Define API endpoints where applicable
  5. Test import locally: Use theneo create --dir . --name "Test Import"
  6. Iterate and refine: Adjust structure based on import results

From Other Documentation Platforms

When migrating from platforms like Swagger UI, Redoc, or Postman:

  1. Export OpenAPI/Swagger spec if available
  2. Use Theneo's import feature: theneo project create --file openapi.json
  3. Export as markdown: theneo export --project your-project --dir ./markdown
  4. Customize markdown files with additional content
  5. Re-import with enhancements: theneo import --dir ./markdown --project your-project

Integration with CI/CD

GitHub Actions Example

Plain text
name: Deploy Documentation
on:
push:
branches: [main]
paths:
- 'docs/**'
jobs:
deploy:
runs-on: ubuntu-latest
steps:
- uses: actions/checkout@v2
- name: Setup Node.js
uses: actions/setup-node@v2
with:
node-version: '16'
- name: Install Theneo CLI
run: npm install -g @theneo/cli@latest
- name: Deploy to Theneo
env:
THENEO_API_KEY: ${{ secrets.THENEO_API_KEY }}
run: |
theneo import \
--dir ./docs \
--project ${{ vars.THENEO_PROJECT }} \
--workspace ${{ vars.THENEO_WORKSPACE }} \
--publish

GitLab CI Example

Plain text
deploy-docs:
stage: deploy
image: node:16
script:
- npm install -g @theneo/cli@latest
- theneo login --token $THENEO_API_KEY
- theneo import --dir ./docs --project $THENEO_PROJECT --publish
only:
- main
when: manual

Conclusion

Theneo's markdown support provides a flexible, developer-friendly approach to API documentation. Whether you prefer working directly in the editor with custom widgets or managing documentation as code through the CLI, Theneo adapts to your workflow while maintaining professional, interactive documentation.

For more information and updates, visit:

Was this section helpful?

What made this section unhelpful for you?

On this page
  • Markdown support

API Specs & Supported Formats

On this page
  • API Specs & Supported Formats

API Testing

Theneo’s API Explorer is an interactive tool that significantly simplifies the API testing process. It allows users to engage with their APIs in real-time, providing an immersive experience that bridges the gap between technical understanding and practical application. Whether you're a developer or a non-technical user, the API Explorer is designed to offer a seamless and intuitive way to explore and validate API functionality.

Key Features of API Explorer

Real-Time Testing
  • Try in API Explorer Button: Every API request in our documentation includes a “Try in API Explorer” button, allowing instant, live interaction with your APIs.
Environment Selection
  • Sandbox and Production Toggle: Test your APIs in a safe sandbox environment or in a live production setting with a simple switch.
User-Friendly Interface
  • Form and Code View: Choose your comfort zone—use the Form View for a guided input experience or the Code View to enter your custom code snippets.
Seamless Navigation
  • Effortless Section Switching: Navigate between different API sections directly in the Explorer without needing to refer back to the documentation.
Informative Fields
  • Field Descriptions: Understand each parameter with clear descriptions and details provided within the Explorer.

Advantages of Using API Explorer

No Setup Required
  • Automatic Synchronization: Changes made in the editor or updates from your API spec are automatically reflected in the API Explorer, eliminating the need for manual setup.
Accessible to All User Levels
  • Designed for Everyone: The API Explorer is crafted to be accessible to users of all skill levels, breaking down barriers to API testing.
Enhanced Learning and Debugging
  • Interactive Learning: By experimenting with live API calls, users can learn more effectively and pinpoint issues on the fly.
On this page
  • API Testing

API Versioning

API versioning in Theneo is designed to be both intuitive and comprehensive, accommodating the natural evolution of your APIs. With Theneo, you can manage and track incremental changes within the same version using the API changelog, as well as create and oversee major version transitions such as moving from v1 to v2 or v3.

Theneo now offers a feature for comprehensive API version management. This feature enables users to meticulously handle different versions of their API, such as v2, v3, and beyond, each with unique statuses and configurations.

Key Features of API Versioning

  • Multiple Versions: Create and manage multiple versions of your API, whether it’s incremental updates or major releases.
  • Status Labels: Assign statuses like active, beta, or deprecated to each version, along with any custom attributes you may need.
  • Project Configuration: Tailor each API version’s project settings, including access management, SEO settings, and analytics.
  • Version-Level Changelogs: Track changes within specific versions, enabling clear communication of updates from 1.1.2 to 1.1.3, etc.

Utilizing the Versioning Feature

  1. Add New Versions: Easily add a new version through your project dashboard by importing a new API spec or using an existing one as a base.
  2. Import Specs: Use the intuitive interface to upload file, link, import from Postman, or input raw text for your API specs.
  3. Manage Versions: Navigate to the settings menu to manage features, access permissions, SEO optimization, and analytics for each API version.
  4. Set Version Status: Define the lifecycle stage of each API version with appropriate status labels directly from the project versions screen.

Managing API Versions in Theneo

Theneo allows you to create and manage multiple API versions seamlessly. Follow the steps below to create new versions, set defaults, and control visibility for better version management.

Creating a New API Version

  1. Access the API Versioning Tab
    1. Navigate to the Project Dashboard and open the API Versioning tab.
  2. Manage Versions
    1. Click on the Manage Versions button to open the version management modal.
  3. Add a New Version
    1. Enter a name for the new version.
    2. Choose how you want to create the version:
      1. Import an updated OpenAPI specification to reflect the latest API changes.
      2. Use an existing version as a starting point and make modifications directly in the editor.
  4. Save and Apply Changes
    1. Once the version is created, you can modify its content, update configurations, and ensure it aligns with your API changes.

Managing Version Tags and Default Versions

  • After creating multiple API versions, you can organize them using version tags.
  • You can also select a default version from the list. The default version will be the one automatically loaded when users access the documentation, ensuring they always see the most relevant version.

Hiding API Versions from Published Documentation

If you want to hide a specific API version from the published documentation:

  1. Open the three-dot menu next to the version you want to hide.
  2. Click the Hide option.
  3. The version will be removed from the public-facing documentation but will remain accessible from the Theneo Dashboard for internal use. You can still view and edit hidden versions, but external users will not be able to see them.

Managing API Versions with CLI Automation

If you prefer to automate the creation and management of API versions, you can use the Theneo CLI. This approach is ideal for integrating version control into your CI/CD workflows or for teams that manage large-scale API updates programmatically.

For detailed instructions on how to create and manage API versions using the CLI, visit our CLI Guide.

Was this section helpful?

What made this section unhelpful for you?

On this page
  • API Versioning

API Changelog

Theneo’s Changelog is an essential tool for developers and stakeholders to track changes and updates to your API specifications. This powerful feature not only documents all modifications automatically but also provides an option for users to subscribe and receive email notifications for each update.

Automated Changelog Documentation

When a new API specification is imported and the "Publish" button is clicked, Theneo automatically detects and summarizes all changes, including:

  • Breaking changes in the API
  • Newly added endpoints
  • Updates to existing sections
  • Modified descriptions
  • Removed sections or endpoints

These updates are meticulously logged on a dedicated changelog page, providing a detailed version history with timestamps.

Changelog Release Notes

Theneo allows users to include concise release notes or summaries for updates made to their API documentation. These notes help highlight changes clearly for both internal teams and external users, and are automatically displayed on the dashboard and the public changelog page.


Feature Purpose

The Changelog Release Note feature provides a quick and efficient way to communicate important updates. Whether written manually or generated by AI, these notes help keep everyone informed of what’s new, changed, or removed in each API release.


Configuration Details

Release notes can be added from the Public Changelog section on your dashboard.


How to Add a Release Note

  1. Navigate to the Public Changelog section on your dashboard.
  2. Click the “Add Release Note” button.
  3. A new input field will appear where you can either:
  • Manually enter a brief summary of the changes
  • Or click “Ask AI” to automatically create a professional summary

AI Summary for Release Notes

In addition to manual input, Theneo offers AI-generated summaries. With a single click, our AI detects all changes in the newly published API specification and provides a professionally written release note.

  • Acts as a technical writer, summarizing key changes
  • Highlights new endpoints, updated descriptions, removed sections, and breaking changes
  • Saves time and ensures consistency in release communications

💡 This is especially useful for teams that want clear, reliable summaries without manual drafting.


Saving Release Notes

After writing or generating your release note:

  1. Click Save to associate the note with the current API update
  2. The note will be automatically displayed:
  • On the dashboard, within the changelog section
  • On the public changelog page

Deleting a Release Note

  1. Hover over an existing release note
  2. Click the trash icon that appears
  3. The note will be permanently removed from both views

Real-Time Email Notifications

How to Subscribe
  1. Enter Your Email: On the Changelog page, there’s a field to enter your email.
  2. Hit Subscribe: Click the “Subscribe” button to start receiving updates on the documentation changes.
Benefits of Subscription
  • Immediate Awareness: Get notified as soon as changes are published, allowing for prompt action or adaptation in your workflow.
  • Convenient Overviews: Email notifications provide a summary of the changes, making it easier to stay informed without needing to check the changelog manually.
  • Version Tracking: Keep a close eye on version progression and ensure that all team members and API consumers are aligned with the latest API developments.

FAQ

Can I turn off the changelog?

Yes, the changelog feature in Theneo is optional. You can disable it at any time by going to your project settings, navigating to the 'Features' section, and toggling off the changelog feature.

Can I edit the changelog?

Currently, direct editing of changelog entries is not available. However, if you need to remove a specific entry from the public changelog, you can delete it. To do this, go to your project configuration, select 'Public Changelog,' and use the delete button next to the entry you wish to remove.

Can I edit versions?

The ability to edit version details is a feature that is in the pipeline and will be available soon. This upcoming feature will provide more control over how you document and present version changes in the changelog.

Will this create a new API version if there are breaking changes?

Theneo is designed to track changes meticulously. The functionality to automatically create a new API version upon detecting breaking changes is being developed. When released, it will allow users to manage versions more effectively and ensure that versioning reflects significant changes or updates.

Was this section helpful?

What made this section unhelpful for you?

On this page
  • API Changelog

Web Editor Widgets

Theneo's web editor is a rich and intuitive platform, equipped with a variety of widgets that enrich the documentation experience. These widgets add depth and clarity to your API documentation, making it more engaging and informative. You can easily access these widgets by simply going to a new line in the editor and typing /, which brings up the widget options. Let's take a look at the widgets available:

FAQ

What happens when I make changes to the API in Theneo and then import a new API spec?

Change Handling: When you import a new API spec, Theneo provides several options to merge these changes:

  • Merging: This logic identifies and imports only the new updates you've made.
  • Overwrite: Overwrites all existing content with the new spec.
  • Append: Adds the new API spec on top of the existing one, useful for combining different API specs.
  • Endpoints: Imports the spec into the 'Collections' tab, allowing you to drag and drop endpoints to your desired location in the documentation.

Can I export the content I am working on, including API updates, from the editor?

Export Capability: Yes, you can export your work, including any API updates. Export Format: As part of our growth package, you can export your documentation to a YAML file. Repository Syncing: This exported file can then be synced with your repository for version control and collaboration.

On this page
  • Web Editor Widgets

API Management inside the editor

The API Management widget allows users to efficiently define, configure, and manage API endpoints within their projects. It offers a structured way to input and manage essential information for request and response parameters, ensuring comprehensive API setup.

How to Add and Configure the API Management Widget

1

Insert the widget

Insert the Widget: To insert the API Management Widget, navigate to the desired section in your documentation. Type / to bring up the widget menu and select API Management.

2

Confgiure API

Configure the HTTP Method: Click on the method dropdown in the widget’s header to select an HTTP method (e.g., POST, PUT, PATCH, DELETE). Define the Endpoint Path: Enter the endpoint path next to the HTTP method, which will be appended to the base URL. Press the Save Changes button or hit Enter to save.

Detail Request Specifications:

  • Headers: Add headers such as content type or authorization tokens.
  • Parameters: Input query parameters or path variables required by the endpoint.
  • Body: For methods like POST or PUT, specify the request body structure.

Form and Code Views: Switch between:

  • Form View: A user-friendly interface for entering request details.
  • Code View: For scripting or pasting raw data.

Configuring the Response

  1. Add the Response Widget: Navigate to the Response tab within the API Management widget. Click the "Add Response" button, which will trigger the response widget to appear.
  2. Add Response Codes: By default, a 200 OK response is included. Add other response codes by clicking the + icon.
  3. Detail the Response:
    1. Form View: Add descriptions and structure the returned data.
    2. Code View: Paste in JSON or other formatted responses, and the widget will parse them for easy reading.
  4. Multiple Responses: Document responses for various status codes (e.g., 200 OK, 400 Bad Request, 500 Internal Server Error) to cover different API outcomes.

Additional Configuration Options

  • Parameter Properties: Click the icon in the right corner of each parameter to trigger a modal for adding extra properties.
  • Required Parameters: Mark parameters as required using a asterisk icon.
  • Parameter Actions: Use the three-dot menu to delete or duplicate parameters.
  • Ask AI: Use AI to suggest descriptions for each parameter by clicking the "Ask AI" button in the description field.
  • Code Beautify: Use the beautify button to format code in code view.
  • Full Screen Mode: Use the full-screen option in the header to manage endpoints more easily.
  • More Actions Menu: The three-dot menu includes options to delete the entire API management section or hide descriptions for request and response parameters in the published view.

If you prefer a cleaner look, use the three-dot menu to hide the description column on the left. This can make the published documentation appear more streamlined.

Video Guide on how API Management widget works

Was this section helpful?

What made this section unhelpful for you?

On this page
  • API Management inside the editor

Live Collaboration

We know, great collaboration leads to great results, and the Live Collaboration feature in our editor ensures that your team can work together in real-time to achieve just that. Whether you're working on documentation or complex projects, this feature allows multiple users to make updates simultaneously, ensuring everyone is on the same page and contributing effectively. With real-time visibility into who’s editing what, collaboration becomes smooth, organized, and more productive.

Key Features of Live Collaboration

  1. See Who’s Currently Editing a Section: At any point during the editing process, users can see which collaborators are actively editing a particular section. This visibility helps avoid confusion or duplication of work and ensures smooth collaboration among team members.
  2. View Where Others Are Editing: Within a section, users can see exactly where their collaborators are making changes in real-time. The editor highlights the text being edited by another user, giving you immediate feedback on what is being updated.
  3. Cursor Visibility: For greater clarity, the cursor of the collaborator is visible within the section description. This allows users to pinpoint the exact location where edits are happening, ensuring that changes are made in the correct area.
  4. See Who’s Editing Which Section in the Menu:The menu provides an overview of who is editing which section. Each section that is being actively worked on by a user is marked with their name, making it easy to track where collaborators are focused. This feature enhances coordination, especially in larger documents with multiple sections.

How to Use Live Collaboration

  • Start Editing Together: Once users are invited to collaborate on a project or document, they can begin editing simultaneously. As soon as one user starts editing a section, others will see their presence and activity in real-time.
  • Communicate with Collaborators: Although the collaboration feature does not include a built-in chat, the real-time presence indicators allow for smooth coordination. Teams can also supplement this feature with external communication tools to enhance collaboration further.
  • Conflict Avoidance: Since all users can see who is editing a section, this minimizes the risk of conflicting edits. It helps maintain organized teamwork and ensures that changes are consolidated without accidental overwrites.
Was this section helpful?

What made this section unhelpful for you?

On this page
  • Live Collaboration

Preview Changes

In Theneo, users can switch to Preview Mode at any time while editing to review the latest changes before publishing. This feature offers several key benefits:

  • Accurate Rendering: Preview Mode allows you to see exactly how your content will appear in the final published documentation. This helps ensure that all formatting, layout, and design elements are rendering as intended.
  • Section-Specific Previews: You can preview changes for individual sections, ensuring that every detail is correct before publishing. This is especially useful when working on larger documents with multiple sections.

How to Use Preview Mode

  1. Locate the Switcher Button: In the editor’s header, you’ll find the Editor/Preview switcher button. This is your key to moving between edit mode and preview mode effortlessly.
  2. Switch to Preview Mode: When you're ready to preview your content, click on the switcher to enter Preview Mode. This will display the most recent version of your documentation as it will appear to end users.
  3. Preview Specific Sections: You can preview any section of your document to see how changes to that section look.

If the preview meets your expectations, you can move forward by selecting the Publish option. Once confirmed, your documentation will go live with all the updates and enhancements you've applied.

Note: Preview mode is a visualization tool to give you a sense of your project's design and layout. It may not represent the full interactivity of your live documentation, such as functional API explorers or live code examples. Use this mode to make any final adjustments before updating your live documentation.

Was this section helpful?

What made this section unhelpful for you?

On this page
  • Preview Changes

Publish a Documentation

Once you’ve finished editing your documentation and are ready to publish, you can do so from the Editor, Dashboard, or via CLI automation. After publishing, your documentation will be accessible to the selected audience.


Private Publishing

By default, project access settings are set to private, meaning that after publishing, the documentation will not be accessible to external users.

  • You can invite users as editors or viewers through Project Access Management settings.
  • Alternatively, set up password-based access for your documentation under a custom domain.
  • For more details on managing access, visit here.

Public Publishing

If you want your documentation to be accessible to a public audience, you can:

  1. Publish the documentation.
  2. Change the access settings from private to public under Project Access Management.

Publishing Without Search Engine Indexing

By default, your documentation is indexed by search engines. However, you can choose to disable indexing so that while your docs remain accessible on the web, they won’t appear in search results.

How to Disable Indexing:

  1. Navigate to Project SEO Management.
  2. Enable the No-Indexing toggle.

Even with indexing disabled, your documentation remains accessible to anyone with the direct link. This feature is useful for publishing beta versions or conducting large-scale user testing without impacting SEO due to potential duplicate content.


Unpublishing the Documentation

To unpublish your documentation:

  1. Go to Project Access Management settings.
  2. Select the Draft option from the access dropdown.

Note: Once unpublished, the documentation link will no longer be accessible to users.

Was this section helpful?

What made this section unhelpful for you?

On this page
  • Publish a Documentation

Branding & Styling

Craft a distinctive look and feel for your Theneo documentation with extensive branding and styling customization options. From choosing the right color palette to setting a custom domain, Theneo empowers you to align your documentation with your brand identity.

Key customization features

  • Light and Dark Mode Customization: Tailor your documentation's appearance for both light and dark mode preferences with dedicated logos and color schemes, ensuring a consistent user experience in any setting.
  • Color Customization: Fine-tune the color of text, buttons, backgrounds, and more with an easy-to-use color picker. Double-click to access HEX codes for precise matching to your brand colors.
  • Custom CSS and JavaScript: For advanced customization, inject custom CSS and JavaScript to take full control over the look and functionality of your documentation.
  • Custom Domains: Strengthen your brand's online presence by hosting your documentation on a custom domain, creating a seamless transition from your main website to your Theneo-hosted content.

With Theneo's customization tools, you can create documentation that not only serves its purpose but also resonates with your brand's aesthetic and ethos, making every interaction with your API an extension of your brand experience.

General Settings

  • Logos: Upload separate logos for light and dark modes, ensuring clear visibility regardless of theme. Ideal dimensions are provided for optimal display.
  • Favicon: Customize the small icon that appears in browser tabs and bookmarks to make your site easily identifiable.
  • Logo Hyperlink: Direct users to your desired URL through the logo in your documentation.
  • Attribution: Toggle the "Powered by Theneo" attribution on or off to match your branding preferences.
  • Document Font: Select from a variety of fonts to maintain consistency across your documentation.

Color Customization of the published view projects:

Color customization is available on Business and Growth plans.

Global Settings:

  • Body Text: Determine the color of the main text for readability against the background.
  • Section Headings: Highlight section titles with distinct colors for better navigation.
  • Background: Choose a primary color for the project's backdrop.
  • Accents: Accentuate borders and outlines with a complementary color.
  • Buttons: Set the background and text colors for buttons to align with your brand.
  • Links: Define the color of hyperlink texts to make them noticeable or integrated.

Left Sidebar Menu:

  • Item Colors: Manage the colors of individual items and the active selection to enhance the sidebar's functionality and aesthetics.
  • Background: Select a primary background color for the sidebar for a unified look.

Content Cards:

  • Code Snippets: Customize header and body background colors for code snippet cards for clarity.
  • Base URL: Adjust the color scheme of the Base URL card headers and bodies.
  • General Info: Set the header and body background colors for general information cards.

Feedback and Text Selection:

  • Feedback Button: Ensure your feedback button stands out or matches your design with customizable colors.
  • Text Selection: Personalize the background and font colors of text selections to reflect your brand.

API Explorer Buttons and Response Boxes:

  • Buttons: Choose colors for your API Explorer buttons that prompt users to interact.
  • Response Boxes: Assign colors to property and value texts in response boxes for distinct visibility.

Alerts:

Customize background, icon, text, and border colors for warning, primary, danger, and success panels, ensuring that each alert type is distinct and noticeable.

Each of these elements can be adjusted for both light and dark modes, maintaining consistency or providing contrast as per your branding guidelines.

Tip for HEX Codes: To quickly use your brand's HEX color codes, simply double-click on the RGB section within the color picker to switch to HSL, where the HEX code input will appear. This allows you to paste your HEX codes directly for precise color matching.

Custom CSS & Javascript

Custom CSS and JS are available on Growth plan.

Custom CSS and JavaScript are powerful tools for personalizing and enhancing the functionality of your Theneo documentation. This guide will walk you through the process of implementing custom CSS and JS to tailor the look and feel of your project.

1

Step 1: Access Custom CSS and JS Settings

Navigate to the 'Branding' section in your Theneo dashboard. Within the Branding menu, you will find a tab or section labeled 'Custom CSS & JS.' This is where you can add your code snippets.

2

Step 2: Write or Paste Your Custom CSS

In the Custom CSS field, you can write your own CSS rules or paste existing snippets. This can include styles for:

  • Custom fonts and text styles
  • Overriding default padding and margins
  • Background images or gradients
  • Custom animations or transitions
  • Responsive adjustments beyond the standard layout

Ensure that your CSS is properly formatted and does not contain any syntax errors to avoid any display issues.

3

Step 3: Write or Paste Your Custom JavaScript

The Custom JS field is where you can add JavaScript to your documentation. Common uses for Custom JS include:

  • Implementing third-party scripts such as analytics or live chat support
  • Custom interactions or behaviors for buttons and links
  • Dynamic content loading or page manipulation
  • Form validation and submission handling

Make sure your JavaScript is well-tested to prevent any conflicts with Theneo's existing scripts.

4

Step 4: Save Your Changes

After adding your custom CSS or JS, click on the 'Save' button to apply the changes. It's important to review your changes to ensure that they produce the desired effect without interfering with the user experience or functionality.

Custom Font

Customizing fonts in your documentation is an excellent way to enhance branding and readability. This guide will walk you through the steps to add a custom font to your documentation using the Custom CSS feature.

1

Step 1: Select a Font

  1. Choose a font:
  2. Visit Google Fonts or any other trusted font source.
  3. Browse and select the font that fits your style.
  4. Alternatively, you can use a Base64-encoded font if you have one, which allows embedding fonts directly without external links.

2

Step 2: Add the Font to Your CSS

Create the necessary CSS code to apply the font to your documentation. Below is an example:

In this example:

  • The @import rule links to the custom font's source.
  • The font-family property applies the chosen font to all text in your documentation (* is the universal selector).
CSS
@import url('https://fonts.googleapis.com/css2?family=Roboto:ital,wght@0,100;0,300;0,400;0,500;0,700;0,900;1,100;1,300;1,400;1,500;1,700;1,900&family=Sofia&display=swap');
* { font-family: "Sofia", serif; font-weight: 400; font-style: normal; }
3

Step 3: Update Your Documentation

  1. Open Theneo Dashboard and navigate to Branding Configuration
  2. Locate the Custom CSS section.
  3. Paste the CSS code from Step 2 into the provided field.
  4. Save the changes.
Was this section helpful?

What made this section unhelpful for you?

On this page
  • Branding & Styling

Custom Domain

A custom domain is a unique branded label that identifies your presence on the Internet. It's essential for establishing brand identity and ensuring a professional appearance for your Theneo projects and Developer Portal. Here's a step-by-step guide to setting up a custom domain for your Theneo-hosted content.

Custom domain is available on Business and Growth plans.

Custom Domain for Projects

  1. Access Project Settings:
    • Log in to your Theneo account.
    • Navigate to the settings of the project you want to assign a custom domain to.
    • Select the "Custom Domain" section.
  2. Enter Your Domain:
    • Specify the custom domain you wish to use, such as docs.yourdomain.com.
  3. Configure DNS Settings:
    • Log into your domain provider’s control panel.
    • Add a CNAME record pointing your custom domain to Theneo’s hosting environment, typically custom.theneo.io.
    • For example, the DNS entry would look like this: developers.example.com. 3600 IN CNAME custom.theneo.io.
  4. Finalize Setup in Theneo:
    • After updating DNS settings, go back to Theneo and save your custom domain configuration.
    • It may take some time for DNS changes to propagate. Once done, your project will be accessible via the custom domain.

Custom Domain for Developer Portal

  1. Access Developer Portal Settings:
    • Go to the Developer Portal settings within Theneo by visiting https://app.theneo.io/developers-hub/settings.
  2. Specify Custom Domain:
    • Enter the custom domain for your Developer Portal, ensuring it aligns with your brand, such as developers.yourdomain.com.
  3. DNS Configuration:
    • Similar to project settings, establish a CNAME record in your DNS configuration, pointing to Theneo’s specified domain.
  4. Activate Your Domain:
    • Finalize your domain settings in Theneo's Developer Portal settings page.
    • Check for successful DNS propagation before the domain goes live.

Important Tips:

  • DNS Propagation: Changes to DNS records can take up to 48 hours to propagate fully across the Internet.
  • SSL Certificates: Theneo automatically generates SSL certificates for custom domains, ensuring secure connections.
Was this section helpful?

What made this section unhelpful for you?

On this page
  • Custom Domain

Feedback & Analytics

Theneo's Documentation Analytics provides in-depth insights into the content you have published and user activity on your documentation. This feature helps you track engagement, identify areas for improvement, and optimize your content based on user interactions.

The analytics data is divided into three key sections:

  • Traffic: Displays overall visitor statistics, including the number of users, page views, and session counts.
  • Pages & Feedback: Shows detailed feedback from users on specific pages and sections.
  • AI Search History: Logs user search queries to help you understand their needs and improve documentation accordingly.

By default, Documentation Analytics is enabled once your documentation is published. The analytics data, including visitor numbers, documentation views, and sessions, can be accessed from the Theneo Dashboard or your Project’s Analytics Page.

If needed, you can disable this feature anytime from the Project Settings page under the Features tab.

Filtering Analytics Data

To gain better insights, you can filter analytics data by selecting a specific date range using the Date Filter. This allows you to track trends over time and analyze how documentation performance changes based on updates or user engagement.

Documentation Views Tracking

Theneo tracks documentation views to help you measure the popularity and reach of your content. Every time a user visits a page on your documentation site, it is recorded as a documentation view.

AI Search History

The AI Search History section logs the queries users search for within your documentation. This feature helps you:

  • Identify common topics and questions users are interested in
  • Understand gaps in your documentation where users struggle to find information
  • Improve your content by adding missing or unclear information

You can search through AI Search History to analyze specific queries and take action accordingly.

Section Feedback

The Section Feedback feature allows users to provide direct feedback on individual sections of your documentation. Users can:

  • Rate sections as helpful or not
  • Leave comments about their experience
  • Suggest improvements for clarity or accuracy
  • Ask questions if they need further clarification

Viewing and Managing Feedback

Feedback left by users is an essential tool for continuous documentation improvement. You can:

  • View a list of comments submitted by visitors
  • Identify patterns in user concerns or suggestions
  • Make data-driven updates to your documentation

By addressing feedback and updating your content accordingly, you can enhance the overall user experience and ensure that your documentation remains accurate, clear, and useful.

Best Practices for Using Documentation Analytics

To make the most of Theneo’s analytics features, consider the following best practices:

  1. Regularly monitor analytics data – Track visitor trends and feedback to stay informed about how your documentation is performing.
  2. Identify weak spots – Use AI Search History and low-performing pages as indicators of where improvements are needed.
  3. Act on feedback – Respond to user comments, update unclear sections, and make necessary changes based on insights from Section Feedback.
  4. Compare trends over time – Use date filtering to observe how documentation changes impact user engagement.

Custom Analytics

Integrating Google Analytics (GA) or Google Tag Manager (GTM) with your Theneo platform allows you to track user interactions and gain insights into how your application is being used. Follow the steps below to add your unique GA tag or GTM ID:

Custom Analytics is available on Business and Growth plans.

Step 1: Navigate to Branding Settings

  1. Log in to your Theneo account.
  2. On the dashboard, locate and click on the “Branding” option in the main navigation menu.

Step 2: Access Analytics Configuration

  1. Within the Branding section, you will see a submenu. Click on the “Analytics” tab to open the analytics configuration options.

Step 3: Adding Your Google Analytics Tag ID

  1. To add a Google Analytics tag:
    • Find the field labeled "Google tag ID."
    • Click on the pencil icon (edit button) next to the field.
    • Enter your Google Analytics ID, which usually starts with “G-” followed by a series of numbers.

Step 4: Adding Your Google Tag Manager ID

  1. To add a Google Tag Manager ID:
    • Locate the field marked "Google tag manager."
    • Click on the pencil icon (edit button) next to this field.
    • Input your GTM ID, which typically begins with “GTM-” or “UA-” followed by a series of numbers.

Step 5: Save Your Changes

  1. After entering your IDs, ensure to save the changes by clicking the save icon or button typically located at the bottom or top-right of the page.

Step 6: Using Custom JavaScript for Other Analytics Services

If you use an analytics service other than Google Analytics or Google Tag Manager:

  1. Go back to the submenu under “Branding.”
  2. Select “Custom CSS & JS” to access the custom scripting functionality.
  3. Here, you can add your own JavaScript tracking codes as needed for other analytics services.

Important Notes

  • Verification: After adding your GA or GTM IDs, it is crucial to verify that they are working correctly. You can do this by checking your GA or GTM dashboard to see if it is receiving data from your Theneo platform.
  • Custom JavaScript: If you are not familiar with JavaScript and need to implement custom tracking scripts, consider consulting with a developer or your analytics provider for assistance
Was this section helpful?

What made this section unhelpful for you?

On this page
  • Feedback & Analytics

Theneo UI

Theneo's published view is crafted to enhance user experience, offering a seamless and intuitive interface for navigating and reading API documentation. This section aims to elucidate the key features of Theneo's published view, providing you with detailed insights and instructions to fully leverage the capabilities of our documentation system. By understanding and utilizing these features, you can streamline your workflow, improve accessibility, and ensure an efficient documentation experience.

Side Menu

The side menu is an integral part of Theneo's published view, providing an organized and accessible way to navigate through the documentation.

Features:

  • Sections and Subsections: The side menu displays all sections and subsections of the documentation, allowing for quick and easy access to different parts of the content.
  • Custom Headers and Icons: Users can create custom headers and add icons for a more visually appealing and easily navigable menu.

Continuous Scrolling

Theneo's continuous scrolling enhances navigation by allowing you to scroll through the documentation without needing to click to navigate to other pages.

Benefits:

  • Seamless Navigation: No need to click through multiple pages; just scroll down to continue reading.
  • Improved User Experience: Continuous scrolling ensures a smooth and uninterrupted reading experience.

Search and AI Search

Finding specific information within the documentation is made easy with our search functionalities.

Features:

  • Standard Search: Quickly locate content by typing keywords into the search bar.
  • ChatGPT Search: Utilize the power of ChatGPT to search for documentation content with more natural language queries.

Custom Menu

The custom menu feature allows you to add any item or group of items in a dropdown for shortcut access.

Customization Options:

  • Add Items: Include any documentation pages, links, or tools you frequently use.
  • Group Items: Organize related items into groups within the dropdown for easier access.

Custom Menu Main Button Highlighting

To make navigation even more intuitive, the Main Button feature allows users to mark one item (excluding subitems) as the main button in the custom menu. This visually distinct button serves as a primary point of focus in the menu.

Main Button Design in Published View:

  • The Main Button will have a distinct design with a highlighted background to make it stand out from other menu items.
  • This ensures that users can easily identify the most important or relevant section of the documentation at a glance.

Anchor Tags for Headers

Anchor links enhances the ability to share and reference specific parts of the documentation.

How it Works:

  • Anchor Tags: Each header in a section is equipped with an anchor tag, allowing you to link directly to that header.
  • Easy Referencing: Share the URL with the specific anchor tag to direct others to the exact part of the documentation you are referencing.

HTTP Method Display in the Side Menu

In your API documentation, you can choose to display HTTP methods (GET, POST, PUT, DELETE, etc.) for each endpoint directly in the side menu. This feature makes it easier for users to quickly identify the type of request each endpoint supports.

Configuring the HTTP Method Display Option

To enable this feature, follow the steps below:

  1. Navigate to Project Settings:
  2. Go to your project's dashboard and open the Project Settings.
  3. Locate the Features Tab:
  4. Inside Project Settings, click on the Features tab to access additional project configuration options.
  5. Enable the HTTP Method Display:
  6. In the Features tab, find the toggle option labeled HTTP Method Display.
  7. By default, this option is turned off. Switch the toggle to on to enable it.
  8. Republish the Project:
  9. After enabling the HTTP Method Display, republish your project to apply the changes.

Once republished, the HTTP methods will be automatically displayed next to each endpoint in the side menu, making the documentation more intuitive for developers.

FAQ

Can I disable continuous scrolling and have only one page at a time?

Yes, with our recent updates, you can switch between continuous scrolling and the single-page template based on your specific needs and document structure. To do so, navigate to the Project Settings on the dashboard, locate the 'Single Page Template' option, and toggle it on.

Can we have a section as a link?

Yes, you can set a section as a redirect link in your documentation. To do this, follow these steps:

  1. Navigate to the Editor:
  2. Go to the project's editor where you manage your documentation.
  3. Choose the Section:
  4. Select the section where you want to set the redirect link.
  5. Open the More Actions Menu:
  6. Click on the three-dot menu (More Actions) next to the section.
  7. Set the Redirect Link:
  8. In the menu, find and click on the option labeled "Set Redirect Link".
  9. Paste the desired URL into the input field provided.
  10. Optional: Open in a New Tab:
  11. If you'd like the link to open in a new tab, check the "New tab" option.
  12. Save and Publish:
  13. Save the changes and republish your documentation. The section will now redirect users to the specified link.
Was this section helpful?

What made this section unhelpful for you?

On this page
  • Theneo UI

Github Actions

1

Create Theneo Documentation

Begin by creating a documentation project within Theneo to house your API details.

2

Set Up GitHub Workflow

Set Up GitHub Workflow

Configure a workflow in your GitHub repository that will interact with Theneo:

  • Create a Workflow File: Add a file named Theneo.yml to the .github/workflows/ directory in your GitHub repository. This file will define the actions to be taken.

Example Theneo.yml Workflow:

YAML
name: Update Documentation
on:
pull_request:
branches:
- main
jobs:
update-doc:
name: Update Theneo Documentation
runs-on: ubuntu-latest
steps:
- run: echo "🎉 The job was automatically triggered by a ${{ github.event_name }} event."
- name: Checkout
uses: actions/checkout@v4
- name: Setup Node.js
uses: actions/setup-node@v4
with:
node-version: "18"
- name: Update Documentation on Theneo
uses: Theneo-Inc/api-documentation@1.8.0
with:
FILE_PATH: doc/api.yml
PROJECT_SLUG: <project_slug>
VERSION_SLUG: <version_slug>
WORKSPACE_SLUG: <workspace_slug>
SECRET: ${{secrets.SECRET}}
AUTO_PUBLISH: true
IMPORT_OPTION: merge
PARAMETER_DESCRIPTION_MERGE_STRATEGY: keep_new
SECTION_DESCRIPTION_MERGE_STRATEGY: keep_old
INCLUDE_GITHUB_METADATA: true

3

Locating Your Theneo Project Slug

To configure GitHub Actions, you'll need your Theneo project slug:

  • Go to your project dashboard in Theneo.
  • Open the desired project.
  • The project slug is part of the URL: https://app.theneo.io/<workspace-name>/<project-slug>/[version-slug].
  • For example, if the URL is https://app.theneo.io/theneo/github-demo, your project slug is github-demo.

Use this project slug for the PROJECT_SLUG variable in your GitHub workflow.

4

Inputs

Define the following inputs in your workflow file to configure the GitHub Action:

  • FILE_PATH: The path to your API documentation file within the repository.
  • PROJECT_SLUG: Your project's unique identifier in Theneo, accessible under project settings.
  • VERSION_SLUG: Project version slug to import documentation under a specific version, otherwise default version will be used.
  • WORKSPACE_SLUG: Project workspace slug to import documentation under specific workspace.
  • SECRET: Your Theneo API token for authentication, which can be found in your Theneo profile.
  • IMPORT_OPTION: Determines how to handle the imported documentation. Options include overwrite, merge, and endpoints.
  • AUTO_PUBLISH: If set to true, Theneo will automatically publish the changes. If false, you can review changes in the editor before manual publication.
  • INCLUDE_GITHUB_METADATA: Includes metadata like the GitHub actor in the documentation, visible only in Theneo's editor.
  • SECTION_DESCRIPTION_MERGE_STRATEGY : Merging strategy for section descriptions to keep old descriptions from theneo editor if needed, valid values are keep_new or keep_old.
  • PARAMETER_DESCRIPTION_MERGE_STRATEGY: Merging strategy for parameter descriptions to keep old descriptions from theneo editor if needed, valid values are keep_new or keep_old.
5

Import Options

Choose how Theneo handles incoming changes:

  • overwrite: Replaces the current documentation with the new spec entirely.
  • merge: Attempts to merge changes; this is experimental and may append changes in some cases.
  • endpoints: Adds new spec endpoints into a dedicated section for manual arrangement.

6

Auto-Publish Option

Control the publication of your documentation:

  • true: Automatically updates the published documentation with the latest changes.
  • false: Allows for a review in Theneo's editor before you decide to publish.

Using Theneo's GitHub Actions integration, the process of maintaining accurate and current API documentation becomes automated, seamless, and efficient. Your team and users gain immediate access to the latest documentation, ensuring everyone is on the same page with API updates and changes.

Was this section helpful?

What made this section unhelpful for you?

On this page
  • Github Actions

Visual Studio Code Extension

Visual Studio Code (VS Code) is a preferred editor for many developers due to its versatility and extensive extension ecosystem. To enhance the experience further, Theneo offers a dedicated VS Code extension that simplifies the creation and previewing of API references directly within the editor.

Installation and Configuration

Install Theneo VS Code Extenstion

Configure the Extension:

  1. After installation, sign in to your Theneo account at app.theneo.io
  2. Once signed in, navigate to your profile settings.
  3. Within your profile settings, locate and select the "Tools & Integrations" section.
  4. In the "Tools & Integrations" section, find and copy your Theneo API key.
  5. In VS Code Extension open the command palette by pressing Ctrl+Shift+P (or Cmd+Shift+P on Mac).
  6. Type 'Preferences: Open Settings (UI)' and select it.
  7. Search for Theneo Markdown in the “Extensions” section
  8. Paste your Theneo API key

New Features

  • Ability to export projects from Theneo as markdown and json.
  • Ability to Import markdown into theneo directly.
  • Ability to merge json to an existing project in Theneo.

Usage

Export Project from Theneo

  1. Open the command palette by pressing Ctrl+Shift+P (or Cmd+Shift+P on Mac).
  2. Search for “Theneo: Export Project from Theneo”.
  3. Select the project from your list of published projects created in Theneo.
  4. Enter a parent directory to export the project and press enter.

Import Project to Theneo

  1. Open the command palette by pressing Ctrl+Shift+P (or Cmd+Shift+P on Mac).
  2. Search for “Theneo: Import Project To Theneo”.
  3. Enter project name after “/”. example /project
  4. Choose if you want to publish the document.

Merge Project to Theneo

  1. Open the command palette by pressing Ctrl+Shift+P (or Cmd+Shift+P on Mac).
  2. Search for "Theneo: Merge Project To Theneo".
  3. Copy the relative path to the section that you want to merge.
  4. Pick the project you are merging with (usually the same project as you exported).
  5. Go over the changes and press commit merge button.

Open Preview

  1. Open the command palette by pressing Ctrl+Shift+P (or Cmd+Shift+P on Mac).
  2. Search for “Theneo: Open Current Project Preview”.
  3. Type the project name and press enter.

The Theneo VS Code extension streamlines the API documentation process by integrating it into your development environment. It saves time and enhances efficiency by eliminating the need to switch between tools for documentation tasks.

With just a few clicks, you can generate a live preview of your API documentation, making it easier to develop and review your API descriptions and endpoints without ever leaving VS Code.

Was this section helpful?

What made this section unhelpful for you?

On this page
  • Visual Studio Code Extension

Theneo CLI

The Theneo CLI (Command Line Interface) is s a command-line tool for effortless management of the Theneo platform from your terminal. Create, manage, and publish API documentation with ease, all without leaving your command line.

You can find Github repo here or the npm package here → https://www.npmjs.com/package/@theneo/cli

To install the Theneo CLI, use the following command:

Bash
npm install -g @theneo/cli@latest

This command installs the Theneo CLI globally on your machine, allowing it to be run from any directory.

Basic Usage

To get started with Theneo CLI, you can use the help command:

Bash
theneo help

This command provides a list of available options and commands:

General Options:

  • -V, --version: Outputs the version number of the Theneo CLI.
  • -h, --help: Displays help for a specific command.

Primary Commands:

  • login: Logs into the Theneo CLI.
  • project <action>:Executes project related commands.
  • workspace <action>: Executes workspace related commands.
  • version <action>: Executes project version related commands.
  • help [command]: Provides help for a specific command.

Common Use Cases

Logging In

Standard Login:

Bash
theneo login

Login with an API Key:

Bash
theneo login --token <theneo-api-key>

You can also set the THENEO_API_KEY environment variable.

Creating a New Project

Bash
theneo project create --help Usage: theneo project create [options] Create new project Options: --name <name> Project name --workspace <workspace> Enter workspace slug where the project should be created in, if not present uses default workspace -f, --file <file> API file path to import (eg: docs/openapi.yml) --link <link> API file URL to create project using it --postman-api-key <postman-api-key> Postman API Key (env: THENEO_POSTMAN_API_KEY) --postman-collection <postman-collection> Postman collection id, you can use multiple times --empty Creates empty project (default: false) --sample Creates project with sample template (default: false) --publish Publish the project after creation (default: false) --public Make published documentation to be publicly accessible. Private by default (default: false) --generate-description <generate-description> Indicates if AI should be used for description generation (choices: "fill", "overwrite", "no_generation", default: "no_generation") --profile <string> Use a specific profile from your config file. -h, --help display help for command

Standard Project Creation:

Bash
theneo project create

Creating a Project with an API Spec File:

Bash
theneo project create --name api-documentation --generate-description overwrite --publish --public --file ./examples/openapi-spec.json

Creating a Project Using a Link to API Documentation:

Bash
theneo project create --name api-documentation --generate-description fill --publish --public --link https://raw.githubusercontent.com/OAI/OpenAPI-Specification/main/examples/v3.0/uspto.json

Creating a Project from Postman Collections:

Bash
theneo project create --name api-documentation --postman-api-key <key> --postman-collection <id-1> --postman-collection <id-2>

Updating API Documentation from an API Spec File

Bash
Usage: theneo project import [options] Import updated documentation into Theneo using file, link or postman collection Note: Published document link has this pattern: https://app.theneo.io/<workspace-slug>/<project-slug>/<version-slug> Options: --project <project-slug> Specify the project slug to import updated documentation in -f, --file <file> API file path to import (eg: docs/openapi.yml) --link <link> API file URL to create project using it --postman-api-key <postman-api-key> Postman API Key (env: THENEO_POSTMAN_API_KEY) --postman-collection <postman-collection> Postman collection id, you can use multiple times --import-type <import-type> Indicates how should the new api spec be imported (choices: "endpoints", "overwrite", "append", "merge") --publish Automatically publish the project (default: false) --workspace <workspace-slug> Workspace slug, where the project is located --projectVersion <version-slug> Project version slug to import to, if not provided then default version will be used --keepOldParameterDescription Additional flag during merging import option, it will keep old parameter descriptions --keepOldSectionDescription Additional flag during merging import option, it will keep old section descriptions --profile <string> Use a specific profile from your config file. -h, --help display help for command

Updating a Project:

Bash
theneo project import --file <file> --project <project-slug> --publish

Import with merge option

Bash
theneo project import --project <project-slug> \ --workspace <workspace-slug> \ --projectVersion <version-slug> \ --publish \ --file ./api-spec.json \ --import-type merge \ --keepOldParameterDescription \ --keepOldSectionDescription

Publishing Documentation

Bash
theneo project publish --project <project-slug>

Deleting a Project

Bash
theneo project delete --project <project-slug>

Project Version

Bash
theneo version --help Usage: theneo version [options] [command] <action> Project version related commands Options: -h, --help display help for command Commands: list [options] List project versions create [options] delete [options] help [command] display help for command

Create Version

Bash
Usage: theneo version create [options] Options: --name <name> Name of the version --project <project-slug> Project slug to create version for --workspace <workspace-slug> Workspace slug where the project is --previousVersion <previous-version-slug> Previous version slug to duplicate the content from --profile <string> Use a specific profile from your config file. -h, --help display help for command

Add ChangeLog subscriber

Bash
Usage: theneo version add-subscriber [options] Add a subscriber for project changelog Options: --project <project-slug> Project slug --workspace <workspace-slug> Workspace slug --projectVersion <previous-version-slug> Project version slug --email <email> Email of the new subscriber to change log --profile <string> Use a specific profile from your config file. -h, --help display help for command

Use the main branch changes

Clone the repository

Bash
git clone git@github.com:Theneo-Inc/theneo-tools.git

Install packages

Bash
nvm use
npm install

Install the CLI

Bash
npm run cli

Run the CLI

Bash
theneo help

Change theneo API endpoint

  • Using environment variable
Bash
THENEO_API_KEY=<theneo-api-key> THENEO_API_URL=https://api.theneo.io THENEO_APP_URL=https://app.theneo.io \theneo <command>

  • Using theneo config file and profile
Bash
theneo login --profile <profile-name> --token <theneo-api-key> --api-url https://api.theneo.io --app-url https://app.theneo.io

check the config file at .config/theneo/config

CLI Export

Export Project Data in Markdown Format - Beta Feature

Bash
Usage: theneo export [options] Options: --project project slug --projectVersion Version slug --workspace Enter workspace slug where the project should be created in, if not present uses default workspace --profile Use a specific profile from your config file. --dir

Export an OpenAPI Spec - Beta Feature

You can export your Theneo docs into an openAPI spec, by running the following command

Bash
theneo export --openapi --format json

You can use the same exporting options as in the regular export command.

Managing Projects Using Markdown Files via CLI

Create a New Project from Markdown Files

Bash
Usage: theneo create [options] Options: --dir <directory> directory location where the project will be exported --name <project-name> project name --workspace <workspace-slug> Enter workspace slug where the project should be created in, if not present uses default workspace --profile <string> Use a specific profile from your config file. -h, --help display help for command

Import Project Data from Markdown Files

Bash
Usage: theneo import [options] Update theneo project from generated markdown directory Options: --project <project-slug> project slug --workspace <workspace-slug> Enter workspace slug where the project

Best Practices and Tips

  • Always check the version of the Theneo CLI installed with theneo -V to ensure compatibility with your project.
  • Utilize the --help option regularly to understand the specific requirements of each command.
  • Regularly update your Theneo CLI to access the latest features and bug fixes.
  • When importing or updating projects, ensure your API specifications are correctly formatted to avoid errors.
Was this section helpful?

What made this section unhelpful for you?

On this page
  • Theneo CLI

Theneo SDK

The Theneo SDK is a comprehensive package designed to simplify API requests to the Theneo API, enabling easy integration of Theneo's features into various applications. This SDK abstracts the complexities of API requests and error handling, providing a more streamlined experience for developers.

This documentation provides an overview of the Theneo SDK package. The SDK package includes classes and interfaces for working with the Theneo API. Theneo is a platform for managing API documentation projects.

You can find the Github repository here

Install

Install the Theneo SDK Package: Use npm to install the Theneo SDK package:

Bash
npm install @theneo/sdk

Usage

To use the Theneo SDK package, import the necessary classes and interfaces, and create an instance of the Theneo class with the required options. Then, you can use the methods provided by the SDK to interact with the Theneo API.

JavaScript
import { Theneo, TheneoOptions, Result, Workspace, ProjectSchema, CreateProjectOptions } from "@theneo/sdk";
// Define Theneo options
const options: TheneoOptions = {
apiKey: "YOUR_API_KEY"
};
// Create a Theneo instance
const theneo = new Theneo(options);
// Example usage
async function listWorkspaces() {
const result: Result<Workspace[]> = await theneo.listWorkspaces();
if (result.ok) {
const workspaces: Workspace[] = result.unwrap();
console.log("Workspaces:", workspaces);
} else {
console.error("Error:", result.unwrap());
}
}
// Create a new project
async function createProject() {
const projectOptions: CreateProjectOptions = {
name: "My Project",
workspace: { key: "workspace-key" },
publish: true,
isPublic: true,
data: {
// Specify the data source using one of the following attributes:
// 1. Import from a file
// file: '/path/to/api-documentation.json',
// 2. Import from a URL
// link: 'https://example.com/api-documentation.json',
// 3. Import from a text string
// text: 'API documentation content as a string',
// 4. Import from a Postman collection
// postman: {
// apiKey: 'YOUR_POSTMAN_API_KEY',
// collectionIds: ['collection-id-1', 'collection-id-2'],
// },
} as ApiDataInputOption
};
const result: Result<CreateProjectResponse> = await theneo.createProject(projectOptions);
if (result.ok) {
const createdProject: CreateProjectResponse = result.unwrap();
console.log("Created Project:", createdProject);
} else {
console.error("Error:", result.unwrap());
}
}
// Use the SDK methods as needed
listWorkspaces();
createProject();

Import API documentation

An example demonstrating how to use the importProjectDocument method to import API documentation to an existing project using the Theneo SDK in TypeScript:

JavaScript
import { Theneo, TheneoOptions, Result, ImportProjectOptions, ImportResponse, ApiDataInputOption } from "@theneo/sdk";
// Define Theneo options
const options: TheneoOptions = {
apiKey: "YOUR_API_KEY"
};
// Create a Theneo instance
const theneo = new Theneo(options);
// Define the import options
const importOptions: ImportProjectOptions = {
projectId: "project-id", // Replace with the actual project ID
publish: true, // Set to true if you want to publish the imported data
data: {
// Specify the data source using one of the following attributes:
// 1. Import from a file
// file: '/path/to/api-documentation.json',
// 2. Import from a URL
// link: 'https://example.com/api-documentation.json',
// 3. Import from a text string
// text: 'API documentation content as a string',
// 4. Import from a Postman collection
// postman: {
// apiKey: 'YOUR_POSTMAN_API_KEY',
// collectionIds: ['collection-id-1', 'collection-id-2'],
// },
} as ApiDataInputOption
};
// Import API documentation to the project
async function importApiDocumentation() {
const result: Result<ImportResponse> = await theneo.importProjectDocument(importOptions);
if (result.ok) {
const importResponse: ImportResponse = result.unwrap();
console.log("Imported API Documentation:", importResponse);
} else {
console.error("Error:", result.unwrap());
}
}
// Run the import function
importApiDocumentation();

In this example:

  • We first create an instance of the Theneo class and provide the necessary API key in the options object.
  • We define the import options in the importOptions object. You should replace 'project-id' with the actual ID of the project where you want to import the API documentation.
  • Inside the data attribute of importOptions, you can specify the source of the API documentation to be imported. You can choose one of the four options:
    1. Import from a file (specify the file path).
    2. Import from a URL (specify the URL).
    3. Import from a text string (specify the content as a string).
    4. Import from a Postman collection (specify the Postman API key and collection IDs).
  • The publish option is set to true to indicate that the imported data should be published.
  • The importApiDocumentation function uses the importProjectDocument method to perform the import operation.

Make sure to replace the placeholder values ('YOUR_API_KEY''project-id', and any others) with your actual API key and project details before running the code.

TheneoOptions (Interface)

Options for initializing the Theneo SDK.

  • apiKey?: string: API key for the Theneo application.
  • apiClientName?: string: Name of the client making the API call (default is theneo-sdk:${SDK_VERSION}).
  • baseApiUrl?: string: Theneo API URL.
  • baseAppUrl?: string: Theneo APP URL.

Theneo (Class)

The main class for interacting with the Theneo API.

Methods

  • listWorkspaces(role?: UserRole): Promise<Result<Workspace[]>>: Lists workspaces available for a user.
  • listProjects(): Promise<Result<ProjectSchema[]>>: Lists user projects.
  • deleteProjectById(projectId: string): Promise<Result<void>>: Deletes a project by ID.
  • publishProject(projectId: string): Promise<Result<PublishProjectResponse>>: Publishes API documentation for a project.
  • getPreviewProjectLink(projectId: string): string returns preview link for a project.
  • importProjectDocument(options: ImportProjectOptions): Promise<Result<ImportResponse>>: Imports API documentation to an existing project.
  • createProject(options: CreateProjectOptions): Promise<Result<CreateProjectResponse>>: Creates a new project on the Theneo platform.
  • getDescriptionGenerationStatus(projectId: string): Promise<Result<ProjectCreationStatusResponse, Error>>: Gets the description generation status for a project.
  • waitForDescriptionGeneration(projectId: string, progressUpdateHandler?: DescriptionGenerationProgressHandler, retryTime?: number, maxWaitTime?: number): Promise<Result<never>>: Waits for description generation to finish.
  • static listPostmanCollections(postmanApiKey: string): Promise<Result<PostmanCollection[]>>: Returns list of Postman Collections using the api key

DescriptionGenerationType (Enum)

An enum representing different types of description generation options.

  • FILL: Generate descriptions for parameters that do not have descriptions already.
  • OVERWRITE: Overwrite descriptions for parameters that do not have descriptions already.
  • NO_GENERATION: Do not generate descriptions for parameters that do not have descriptions already.

DescriptionGenerationProgressHandler (Type)

A callback function type that receives the progress percentage of description generation.

PostmanImportOptions (Interface)

Options for importing Postman collections.

  • apiKey: string: Postman API key.
  • collectionId: string[]: Postman collection IDs to be imported.

WorkspaceOption (Interface)

Workspace options for creating a project.

  • key?: string: Workspace key.
  • id?: string: Workspace ID.

ApiDataInputOption (Interface)

Data input options for creating a project. Specify only one of the following attributes.

  • file?: fs.PathLike: Path to a file containing API documentation.
  • link?: URL: URL to a file containing API documentation.
  • text?: string: API documentation as a string.
  • postman?: PostmanImportOptions: Postman collection to create the project from.

CreateProjectOptions (Interface)

Options for creating a project.

  • name: string: Project name.
  • workspace?: WorkspaceOption: Workspace where to create the project (default is the user's default workspace).
  • publish?: boolean: Indicates if the project should be published after creation (default is false).
  • isPublic?: boolean: Indicates if the project is public (default is false).
  • data?: ApiDataInputOption: API documentation data for creating the project.
  • sampleData?: boolean: Indicates if the project should be created with sample data.
  • descriptionGenerationType?: DescriptionGenerationType: Description generation type.
  • progressUpdateHandler?: DescriptionGenerationProgressHandler: Callback for description generation progress.

ImportOption (Enum)

An enum representing different options for importing API specifications.

  • ENDPOINTS_ONLY: Import only the endpoints.
  • OVERWRITE: Overwrite existing data.
  • MERGE: Merge with existing data.

ImportProjectOptions (Interface)

Options for importing API documentation to an existing project.

  • projectId: string: Project ID.
  • publish: boolean: Indicates if the imported data should be published.
  • data: ApiDataInputOption: API documentation data for importing.
  • importOption?: ImportOption: Import option.

PublishProjectResponse (Interface)

A response object after publishing a project.

  • projectKey: string: Project key.
  • baseUrlRequired: boolean: Indicates if a base URL is required.
  • companySlug: string: Company slug.
  • publishedPageUrl: string: URL of the published page.

CompanySchema (Interface)

A schema representing company information.

  • id: string: Company ID.
  • name: string: Company name.
  • slug: string: Company slug.
  • corporateId: string: Corporate ID.
  • createdAt: Date: Creation date.
  • updatedAt: Date: Last updated date.
  • createdBy: string: Created by user.

ProjectSchema (Interface)

A schema representing project information.

  • id: string: Project ID.
  • name: string: Project name.
  • key: string: Project key.
  • isPublic: boolean: Indicates if the project is public.
  • companyId: string: Company ID.
  • createdAt: Date: Creation date.
  • company: CompanySchema: Company information.

CreateOtherTypeOfDocOptions (Interface)

Options for creating other types of documentation.

  • docType: string: The type of documentation.
  • gettingStartedSections?: { introduction: boolean; prerequisites: boolean; quickStart: boolean; resources: boolean; }: Sections for getting started documentation.
  • sdk?: { overview: boolean; supportedLibraries: boolean; sampleCode: boolean; troubleshooting: boolean; }: SDK documentation sections.
  • faq?: { generalInfo: boolean; authentication: boolean; usage: boolean; billing: boolean; }: FAQ sections.

CreatedProjectStatusEnum (Enum)

An enum representing different statuses for a created project.

  • CREATED: Project creation completed successfully.
  • STARTED: Project creation is in progress.
  • FINISHED: Project creation finished successfully.
  • ERROR: Project creation encountered an error.
  • CREATED_WITHOUT_AI_GENERATION: Project created without AI generation.

CreateProjectResponse (Interface)

A response object after creating a project.

  • projectId: string: Project ID.
  • publishData?: PublishProjectResponse: Information about the published project.

ProjectCreationStatusResponse (Interface)

A response object containing information about the status of project creation.

  • name: string: Project name.
  • key: string: Project key.
  • creationStatus: CreatedProjectStatusEnum: Creation status.
  • descriptionGenerationProgress: number: Progress of description generation in percentage.
  • updatedAt: string: Last updated date.

ImportResponse (Interface)

A response object after importing a project.

  • collectionId: string: Collection ID.
  • publishData?: PublishProjectResponse: Information about the published project.

UserRole (Enum)

An enum representing different user roles.

  • ADMIN: Administrator.
  • EDITOR: Editor.

Workspace (Interface)

Workspace information.

  • workspaceId: string: Workspace ID.
  • name: string: Workspace name.
  • slug: string: Workspace slug/key.
  • role: UserRole: Workspace role.
  • isDefault: boolean: Indicates if the workspace is the default workspace.
  • isCorporate: boolean: Indicates if the workspace is corporate.
  • isSubscribed: boolean: Indicates if the workspace is subscribed.

ResultImp (Abstract Class)

An abstract class representing the result of an operation that can either succeed with a value of type T or fail with an error of type E.

Methods

  • unwrap(): T: Unwraps the successful result value. If the result is an error, this method will throw an exception.
  • unwrap<U>(ok: (value: T) => U): U: Unwraps the successful result value and applies a function to it.
  • unwrap<U, V>(ok: (value: T) => U, err: (error: E) => V): U | V: Unwraps the result value and applies functions based on whether it's a success or an error.
  • unwrap<U>(ok: (value: T) => U, err: (error: E) => U): U: Unwraps the result value and applies a function based on whether it's a success or an error.
  • map<U>(ok: (value: T) => U): Result<U, E>: Transforms a successful result into a new result with a different value type.
  • map<U, F extends Error>(ok: (value: T) => U, err: (error: E) => F): Result<U, F>: Transforms a result into a new result with different value and error types.
  • chain<X>(ok: (value: T) => Result<X, E>): Result<X, E>: Chains a function that produces a new result based on the success value.
  • chain<X>(ok: (value: T) => Result<X, E>, err: (error: E) => Result<X, E>): Result<X, E>: Chains functions for both success and error cases.
  • chain<X, U extends Error>(ok: (value: T) => Result<X, U>, err: (error: E) => Result<X, U>): Result<X, U>: Chains functions with different error types.

OkResult (Class)

A class representing a successful result.

Properties

  • value: T: The successful value.

ErrResult (Class)

A class representing an error result.

Properties

  • error: E: The error object.

Ok(value: T): Result(Function)

A function for creating a successful result.

  • value: T: The value to wrap in the result.

Err(error?: E): Result (Function)

A function for creating an error result.

  • error?: E: An optional error object.

ResponseSchema (Interface)

An interface representing the schema of a response object.

  • data: T: The data payload of the response.
  • message: string: A message associated with the response.
Was this section helpful?

What made this section unhelpful for you?

On this page
  • Theneo SDK

Postman Sync

Theneo supports automatic synchronization with Postman collections via GitHub. This powerful integration ensures that any changes you make to your Postman API collections are seamlessly updated in your Theneo documentation—without manual effort.

By setting up a GitHub integration in Postman and configuring a Theneo GitHub Action workflow, you can keep your API documentation fully aligned with your latest API definitions.

Benefits of Postman Sync

  • Real-time Updates: Every change you make in Postman is reflected in Theneo.
  • No Manual Uploads: Eliminate the need to manually export and upload collections.
  • Version Control: Changes are tracked through GitHub, enabling better collaboration and rollback capability.
  • Streamlined Workflow: Developers can focus on building APIs while keeping docs always up-to-date.
  • Automated Publishing: With auto-publish enabled, your docs stay fresh without extra steps.

How to Set Up Postman to GitHub Sync

1

Open Integrations in Postman

  • Open Postman.
  • Navigate to the Integrations tab.
2

Connect GitHub to Postman

  • Search for GitHub in the integrations list.
  • Select "Back up a collection" from the available configuration options.
  • Enter your GitHub API key to authorize the connection.
3

Choose Postman Workspace and Collection

  • Select the Postman workspace that contains your collection.
  • Choose the collection you want to sync with GitHub.
4

Set GitHub Repository and File Details

  • Pick the GitHub repository where the collection will be stored.
  • (Optional) Enter a directory path if you want to save the file in a specific folder.
  • Define the file name (e.g., api.yml).
  • Choose the branch where the file should be committed (typically main).

After completing this setup, all updates made in Postman will be automatically pushed to your GitHub repository.


Syncing GitHub Updates with Theneo

To ensure updates also sync to Theneo automatically, you'll need to configure Theneo GitHub Actions in your repository.

Create a Workflow File

Add a file named Theneo.yml in the .github/workflows/ directory of your GitHub repo.

Here’s an example workflow file:

YAML
name: Update Documentation on: pull_request: branches: - main jobs: update-doc: name: Update Theneo Documentation runs-on: ubuntu-latest steps: - run: echo "🎉 The job was automatically triggered by a ${{ github.event_name }} event." - name: Checkout uses: actions/checkout@v4 - name: Setup Node.js uses: actions/setup-node@v4 with: node-version: "18" - name: Update Documentation on Theneo uses: Theneo-Inc/api-documentation@1.8.0 with: FILE_PATH: doc/api.yml PROJECT_SLUG: <project_slug> VERSION_SLUG: <version_slug> WORKSPACE_SLUG: <workspace_slug> SECRET: ${{secrets.SECRET}} AUTO_PUBLISH: true IMPORT_OPTION: merge PARAMETER_DESCRIPTION_MERGE_STRATEGY: keep_new SECTION_DESCRIPTION_MERGE_STRATEGY: keep_old INCLUDE_GITHUB_METADATA: true

Replace placeholders like <project_slug>, <version_slug>, and <workspace_slug> with your actual Theneo values. Make sure to add your Theneo secret in GitHub repository secrets.

Need help setting this up visually?

👉 Here is the video guide for more guidance:


More Resources

For complete details on how to configure Theneo GitHub Actions, visit our setup guide here.

Once you've successfully configured GitHub sync in Postman and set up the Theneo GitHub Action workflow, your API documentation in Theneo will stay automatically in sync with your latest Postman updates.

Was this section helpful?

What made this section unhelpful for you?

On this page
  • Postman Sync

GitLab Sync

Theneo offers seamless synchronization with GitLab repositories, enabling automatic pushing of your API specifications or entire documentation folders to your Theneo workspace. This guide walks you through the steps to configure GitLab CI/CD for Theneo sync.

Before starting, make sure you have:

  • A GitLab repository where you manage your API specs or documentation.
  • Your Theneo API Key.
  • The following Theneo configuration variables set in your GitLab CI/CD settings:
  • THENEO_API_KEY: Your Theneo API token, used for authentication, can be found in your Theneo profile settings.
  • THENEO_PROJECT_SLUG: Your project's unique identifier in Theneo, accessible under project settings.
  • THENEO_WORKSPACE_SLUG: Project workspace slug to import documentation under specific workspace, accessible under project settings.
  • THENEO_VERSION_SLUG: Project version slug to import documentation under a specific version, otherwise default version will be used.
  • THENEO_FILE_PATH : The path to your API documentation file within the repository (for API spec import).
  • Folder_PATH : The path to your documentation folder within the repository (for folder import).

Setup Instructions

You can configure the sync by either editing your existing .gitlab-ci.yml file or creating a new one in your repository.

Import API Specs Only

To push a single OpenAPI spec file to Theneo, use the following .gitlab-ci.yml script:

YAML
image: node:22 stages: - push-to-theneo push-openapi-to-theneo: stage: push-to-theneo script: - npm install -g @theneo/cli@latest - echo "Logging in to Theneo..." - theneo login --token $THENEO_API_KEY - echo "Listing Theneo projects..." - theneo project list - echo "Importing OpenAPI spec to Theneo..." - | theneo project import \ --project $THENEO_PROJECT_SLUG \ --workspace $THENEO_WORKSPACE_SLUG \ --projectVersion $THENEO_VERSION_SLUG \ --publish \ --file $THENEO_FILE_PATH \ --import-type overwrite

You can also specify how Theneo handles incoming changes using the --import-type option:

  • overwrite – Replaces the existing documentation with the new specification entirely.
  • merge (beta) – Attempts to combine new content with existing documentation. May append or blend content based on:
  • PARAMETER_DESCRIPTION_MERGE_STRATEGY: keep_new
  • SECTION_DESCRIPTION_MERGE_STRATEGY: keep_old
  • endpoints – Adds new spec endpoints into a separate section for manual arrangement later in the editor.

Import an Entire Folder

To push an entire folder to Theneo, use this alternative script:

YAML
image: node:22 stages: - push-to-theneo push-openapi-to-theneo: stage: push-to-theneo script: - npm install -g @theneo/cli@latest - echo "Logging in to Theneo..." - theneo login --token $THENEO_API_KEY - echo "Listing Theneo projects..." - theneo project list - echo "Importing OpenAPI spec to Theneo..." - | theneo import \ --project $THENEO_PROJECT_SLUG \ --workspace $THENEO_WORKSPACE_SLUG \ --projectVersion $THENEO_VERSION_SLUG \ --publish \ --dir $Folder_PATH \

Notes

  • Make sure the @theneo/cli version is kept up to date to benefit from the latest features and fixes.
  • The --publish flag will automatically make your imported content live on Theneo.
Was this section helpful?

What made this section unhelpful for you?

On this page
  • GitLab Sync

Bitbucket

Bitbucket’s collaborative environment is ideal for teams to manage their codebase. Integrating Bitbucket with Theneo ensures your API documentation stays in sync with your repository changes. Here’s how to set up Bitbucket integration:

Usage

Step 1: Create Theneo Documentation

Initiate your API documentation by creating a project on the Theneo platform.

Prerequisites for Bitbucket Integration

After setting up the Bitbucket pipeline with the appropriate Theneo variables, your API documentation will automatically reflect changes pushed to your repository. This seamless integration facilitates an up-to-date and accurate representation of your API for developers and stakeholders.

Step 2: Configure Bitbucket Pipeline

Incorporate Theneo's automation into your Bitbucket repository:

  • Add a Pipeline: Integrate Theneo's pipeline into your bitbucket-pipelines.yml file to update your Theneo documentation with each repository update.
  • Configure the Pipeline: Use the snippet below in your bitbucket-pipelines.yml file to set up the pipeline.

For Importing a single API Spec

YAML
# bitbucket-pipelines.yml image: node:22 pipelines: default: - step: name: Import OpenAPI spec to Theneo caches: - node script: # Install CLI + login - npm install -g @theneo/cli@latest - echo "Logging in to Theneo..." - theneo login --token "THENEO_API_KEY" # Import the spec file - | theneo project import \ --project "THENEO_PROJECT_KEY" \ --workspace "$THENEO_WORKSPACE_SLUG" \ --publish \ --file "API_DOCUMENT_PATH" \ --import-type merge

Variables for Bitbucket Pipeline:

  • API_DOCUMENT_PATH: The path to your API spec within your repository. e.g docs
  • THENEO_PROJECT_KEY: The unique slug of your Theneo project. Find this in your Theneo project URL: https://app.theneo.io/[workspace-name]/[project-slug]. For example, if your Theneo project URL is https://app.theneo.io/theneo/bitbucket-demo, the bitbucket-demo is your project slug.
  • THENEO_API_KEY: Your Theneo API key, which you can generate from the Theneo website.

Sample script

Plain text

In here, this is my sample token --token "8dd81-f628-40fd-9ff2-b84f7d42da6d", testdoc is the project slug --project "testdoc" , and my api spec is located here docs/petstore.yaml

Import Options

Choose how Theneo handles incoming changes:

  • overwrite: Replaces the current documentation with the new spec entirely.
  • merge: Attempts to merge changes; this is experimental and may append changes in some cases.
  • endpoints: Adds new spec endpoints into a dedicated section for manual arrangement.

For Importing an entire folder (markdowns + API)

If you would like to import exported markdown content + API configuration, then you can use the following script

YAML
# bitbucket-pipelines.yml image: node:22 pipelines: default: - step: name: Push OpenAPI to Theneo caches: - node script: - npm install -g @theneo/cli@latest - echo "Logging in to Theneo..." - theneo login --token "THENEO_API_KEY" - echo "Listing Theneo projects..." - theneo project list - echo "Importing OpenAPI spec to Theneo..." - echo "Updating a Project in Theneo..." - theneo import --project "THENEO_PROJECT_KEY" --workspace "Workspace_name" --dir path_to_yourfolder
On this page
  • Bitbucket

AI Co-Pilot

Theneo AI Co-Pilot revolutionizes the way you create API documentation by automating the generation of descriptive content. This powerful feature saves you significant time and effort, particularly when your API undergoes frequent updates. Here’s how you can leverage the AI Co-Pilot in Theneo:

1. Opting for AI Assistance During Project Creation:

  • Full AI Assistance: Choose this to allow the AI to craft new content for each part of your documentation, replacing existing descriptions for consistency and engagement.
  • Enhance Existing Content: Select this for the AI to smartly fill in missing pieces without modifying what you’ve already crafted, preserving the originality of your content.
  • No AI Assistance: If you prefer manual control over your content, opt for this to keep the existing documentation untouched by AI.

2. Using AI Assistant Within the Editor:

  • Click on "AI Assistant" in the editor when working on an API spec.
  • The AI Assistant proactively suggests detailed descriptions for each component of your API request, such as headers, body, parameters, and responses.

Example Workflow:

  • Imagine you're documenting an order creation endpoint with a body parameter like idempotency_key. The AI Co-Pilot might suggest a description such as "Provide a unique key to prevent duplicate orders on network failure," clarifying its use for your consumers.

Advantages of Theneo AI Co-Pilot:

  • Time Efficiency: It dramatically reduces the time required to write and update documentation.
  • Consistency: Ensures uniformity in language and style across all documentation segments.
  • Accuracy: AI-generated content is designed to be precise, reducing potential errors and misunderstandings.
  • Focus on Core Tasks: Frees up your time to concentrate on API design and development rather than documentation.

Integrating Theneo AI Co-Pilot:

The Theneo AI Co-Pilot is an invaluable resource, akin to having a dedicated technical writer on your team. It enhances your documentation process, ensuring that your API is documented thoroughly, accurately, and in a way that’s easy to understand for users, all while you remain focused on the more strategic aspects of API design and functionality.

Was this section helpful?

What made this section unhelpful for you?

On this page
  • AI Co-Pilot

AI Search

Theneo's ChatGPT integration allows users to interact with your documentation in a conversational manner. They can ask any questions related to the documentation content, ranging from technical queries to business-related inquiries, directly within the docs.

Enabling ChatGPT Integration:

  1. Navigate to the Settings area of your Theneo dashboard.
  2. Locate the Features section.
  3. Find the AI search option and toggle the switch to enable it.
  4. Republish your documentation to make the AI search feature live.

Using AI Search in Theneo:

Once enabled, users can ask questions directly within the documentation interface. The system is designed to comprehend the context of the documentation and provide relevant answers, leveraging the powerful capabilities of GPT-4 turbo.

FAQ:

Does Theneo send entire documentation content to ChatGPT for processing?

No, Theneo ensures that only pertinent snippets of information are sent to ChatGPT based on the user's query to maintain efficiency and privacy.

Which AI model does Theneo use for processing user queries?

Theneo uses the latest GPT-4 turbo, ensuring that users benefit from the most advanced language model for their queries.

By integrating ChatGPT, Theneo enhances the user experience by providing an interactive, AI-driven approach to navigating and understanding API documentation. This feature not only adds a layer of user engagement but also aids in quickly resolving queries, making the documentation more accessible and user-friendly.

Note: You can try chatGPT even in this doc, simply click on search and then click on “ask AI” button

Was this section helpful?

What made this section unhelpful for you?

On this page
  • AI Search

AI Chatbot

The AI Chatbot feature is designed to streamline the process of finding information about Theneo, helping users quickly receive accurate answers without having to sift through extensive documentation. Located on Theneo's dashboard, this intelligent assistant is trained on Theneo's documentation, knowledge base, and other relevant content to ensure users get the information they need with ease.

But there’s more! You can harness the same power for your documentation by creating and embedding your own AI chatbot. Let’s explore how this feature can enhance your support experience and why it’s a game-changer for you and your users.


Why Use the AI Chatbot?

For Theneo Users

  • Quick Problem Solving: Have a specific question about Theneo? Just ask the chatbot! It provides fast, accurate answers without requiring you to navigate through extensive guides.
  • Ease of Use: The intuitive interface ensures that even first-time users can interact seamlessly with the chatbot and find what they need in seconds.
  • Comprehensive Knowledge: With access to Theneo’s entire knowledge base and documentation, the chatbot covers all aspects of the platform, from simple FAQs to in-depth technical details.

For Your Own Documentation

The AI Chatbot is not just for Theneo users. You can also:

  • Train the Chatbot on Your Content: Input your own documentation, FAQs, and support materials, creating a tailored chatbot for your platform.
  • Provide 24/7 Support: Offer uninterrupted assistance to your users without increasing support team resources.
  • Enhance Productivity: Free up your support team to focus on complex queries while the chatbot handles routine questions efficiently.

Features That Make the AI Chatbot Stand Out

  1. Smart, Context-Aware Assistance The chatbot understands context and nuances, ensuring it provides the most relevant responses to user queries.
  2. Customizable for Your Brand Configure the chatbot to align with your brand’s tone, style, and voice, creating a consistent experience across your platforms.
  3. Seamless Integration Embed the chatbot into your documentation or platform effortlessly. Whether it’s your developer portal, website, or product interface, the chatbot fits right in.
  4. Search Export Capability Export the chatbot’s functionality to external platforms like websites, apps, or customer portals. This feature extends its utility beyond the documentation, offering users a unified experience wherever they interact with your content.

Benefits of Exporting and Embedding the Chatbot

  • Wider Reach: Bring your chatbot to where your users are—on your platform, website, or mobile app.
  • Streamlined User Journeys: Offer users quick answers and guidance directly within the interface they’re using, eliminating the need to switch between platforms.
  • Improved User Satisfaction: By providing instant support, you make your users feel valued and supported, fostering loyalty and trust.

How to Get Started

Click here to learn how you can integrate your own intelligent help bot and elevate your user support experience.

Was this section helpful?

What made this section unhelpful for you?

On this page
  • AI Chatbot

AI Export

The AI/Markdown Export feature in Theneo allows you to quickly generate Markdown versions of your documentation. Markdown files are lightweight, structured, and optimized for AI processing. By exporting your content in Markdown, you can:

  • Achieve better response accuracy when using AI tools.
  • Reduce token usage and improve processing speed.
  • Provide AI assistants with full context of your documentation.

This feature is particularly helpful when working with AI tools like ChatGPT, Claude, Gemini, and Perplexity, as well as AI-powered code assistants such as Cursor, Codex, and Copilot.

Tip: Curious to see it in action? Feel free to test the AI Export feature directly within this Theneo user guide.


How to Enable AI/Markdown Export

Follow these steps to enable and use the AI/Markdown Export functionality:

1

Step 1: Access Project Settings

  1. Sign in to your Theneo dashboard.
  2. Navigate to the project you want to enable the feature for.
  3. Open Project SettingsFeatures.

2

Step 2: Enable the AI Helper & Export

  1. Locate the AI Helper & Export option in the Features list.
  2. Toggle the switch ON.

3

Step 3: Configure Export Options

Once the feature is enabled, select which options you want to appear in the AI Export dropdown.

4

Step 4: Export Markdown

  • Navigate to your project documentation pages and use the AI Export dropdown to generate a Markdown version of your content.
  • You can use these Markdown files directly in AI tools.

Note: The AI/Markdown Export feature is only available for public projects.

Was this section helpful?

What made this section unhelpful for you?

On this page
  • AI Export

Templates

Theneo provides a rich selection of templates specifically designed for Developer Portals, offering visually appealing and functional designs to showcase your APIs and developer resources effectively.

Find Your Perfect Developer Portal

Browse real examples in Theneo’s catalog to inspire and guide your ideal developer experience.

Selecting the Right Template

  1. Diverse Range: Explore Theneo's variety of Developer Portal templates, each crafted to meet different aesthetic preferences and functional requirements.
  2. Industry-Specific Options: Choose from templates tailored to various industries, ensuring that the design aligns with industry norms and appeals to your target developer audience.
  3. Customization: While templates offer a predefined layout and design, they are flexible enough for customization. Adapt the chosen template to your brand’s colors, logos, and other visual elements to maintain brand consistency.
  4. Content Integration: Seamlessly integrate essential elements like API documentation, SDKs, guides, and interactive tools into the template. This integration ensures that developers have easy access to all necessary resources.
  5. Interactivity and Engagement: Many templates include features like interactive API explorers or AI chatbots to enhance user engagement and provide practical experience with your API.
  6. Responsive Design: With mobile responsiveness being a key consideration, these templates ensure that your Developer Portal is accessible and user-friendly across various devices.

Advantages of Using Theneo Templates for Developer Portals

  • Quick Setup: Templates accelerate the creation process, allowing you to launch a professional-looking Developer Portal in less time.
  • Professional and Cohesive Design: Each template is professionally designed, ensuring that your Developer Portal not only functions well but also visually communicates your brand's professionalism.
  • Ease of Navigation: Templates are structured to provide intuitive navigation, making it easier for developers to find the information they need.
  • Consistent User Experience: A uniform design across all pages of the Developer Portal enhances user experience and brand perception.

By utilizing Theneo’s templates for your Developer Portal, you can create an inviting and efficient environment for developers. This approach not only saves time and resources but also ensures that your portal stands out in terms of both functionality and design, ultimately enhancing developer engagement and API adoption.

Here are some of the examples:

Rimsy's API Catalogue powered by Theneo:

Paymob's Interactive Developer portal for various regions:

Explore our sample templates:

Solid

Bloom

Roboto

Was this section helpful?

What made this section unhelpful for you?

On this page
  • Templates

Custom Design

Theneo's Developer Portal offers a service that caters to clients who desire a custom design for their developer portal. If you have a design ready in Figma or any other design tool, Theneo's team is capable of transforming that design into a fully functional developer portal. Here's a quick guide on how to avail of this service:

Steps for Custom Design Implementation:

  1. Design Preparation:
    • Finalize your design in Figma or your preferred design tool.
    • Ensure that the design is detailed and includes all the necessary elements you want to have on your developer portal.
  2. Submit Your Design:
    • Contact the Theneo support team and provide them with your design files.
  3. Design Review and Confirmation:
    • The Theneo team will review your design to ensure that it's feasible and aligns with their platform capabilities.
    • They may provide feedback or suggestions to optimize the design for the developer portal environment.
  4. Implementation Phase:
    • Once the design is approved, Theneo's team will start the implementation process.
    • The team utilizes your design as a blueprint to create a custom-tailored developer portal.
  5. Delivery and Review:
    • Theneo aims to deliver the implemented design within 3 business days.
    • Once delivered, review the developer portal to ensure it meets your expectations and that the design has been implemented accurately.
  6. Revisions if Necessary:
    • If there are any discrepancies or additional tweaks needed, communicate these to the Theneo team.
    • Theneo will work on the revisions to match your specifications.
  7. Finalization and Go-Live:
    • After any necessary adjustments, the developer portal is finalized.
    • You can then proceed to publish the portal and make it accessible to your users.

Custom design is available on Growth plan.

Was this section helpful?

What made this section unhelpful for you?

On this page
  • Custom Design

Developer Portal Editor

Theneo's Developer Portal Editor offers a flexible environment where you can drag and drop various elements to construct a customized interface for your developer portal. For those who are more comfortable with direct coding, the editor provides an option to dive into the HTML and CSS code, allowing for granular control over the design and functionality. Additionally, the editor includes a feature to export your code, enabling you to work on it offline or in a different environment and then import it back into Theneo seamlessly.

Key Elements and Functionalities

  • HTML Tab: Directly edit the HTML structure of your portal. You can add, remove, or modify elements like divs, sections, and other HTML5 elements.
  • CSS Tab: Style your portal with custom CSS. You have the freedom to define styles, manage layouts, and ensure your branding is on point with precision.
  • Export to ZIP: Safeguard your work or collaborate with others by exporting your entire project's codebase. This feature is particularly useful for backing up your work or transferring it to another platform or team member.
  • Code Import: Already have code ready to go? Import it directly into the editor to jump-start your portal development. This feature supports a seamless transition from other development environments into Theneo.

Using the Editor for Customization

  1. Layout Management: Use the drag-and-drop feature to organize your layout with elements like columns, image blocks, and text sections.
  2. Interactive Elements: Add interactive components such as forms, buttons, and navigation bars to enhance user interaction.
  3. Multimedia Integration: Embed multimedia content with image and video blocks to enrich your content.
  4. Custom Styling: Access the CSS tab to apply custom styles, adjust layouts, or fine-tune the appearance of your portal.
  5. Content Structuring: Edit the HTML directly to structure your content semantically, ensuring a logical hierarchy and SEO-friendly markup.
  6. Backup and Version Control: Use the export feature to create backups of your portal's code, allowing you to maintain different versions or revert changes if necessary.
  7. Collaboration: Share your exported code with team members to collaborate on the development of your portal, ensuring everyone can contribute their expertise.
  8. Final Touches: Before publishing, import your code back into Theneo to see your changes reflected in real-time, ensuring your portal looks and functions exactly as intended.
Was this section helpful?

What made this section unhelpful for you?

On this page
  • Developer Portal Editor

Export / Import Code

If you need to add functionalities or customize the appearance of your HTML beyond what is available in the Theneo Developer Portal's online editor, such as intricate hover effects or specific color gradients, exporting and editing your code is a straightforward process. Here's a detailed guide to exporting your code for customization and then importing it back into the Developer Portal.

Exporting Code for Advanced Customization

1

Step 1: Export Your Code from the Developer Portal

  1. Navigate to the Developer Portal.
  2. Access the code editor by clicking on the code icon.
  3. Click on "Export to ZIP" to download your current project's code.
2

Step 2: Customize Your HTML and CSS Code

  1. Extract the ZIP file on your local machine.
  2. Open the HTML and CSS files in your chosen text editor for modifications.

You can now add custom styles or scripts that you require. For example:

  • To change a hover effect color or gradient, you can directly modify the CSS.
3

Step 3: Merging HTML and CSS Files for Import

  1. Create a <style> tag in the HTML file, and paste all the styles from the CSS file into this tag.
  2. Ensure that for both dark and light themes, there is a <div class="content-wrapper"> for the light theme. To enable dark mode, add the class <div class="content-wrapper dark-theme">.

Importing Customized Code Back into the Developer Portal

  • Return to the Theneo Developer Portal.
  • Click on the import icon within the code editor.
  • You can now paste the updated HTML code directly into the editor.
Was this section helpful?

What made this section unhelpful for you?

On this page
  • Export / Import Code

Developer Portal Dashboard & Page Management

The Developer Portal section on the dashboard serves as a centralized hub where users can manage multiple developer portal pages efficiently. It includes the following sub-sections: Analytics, Settings, Page Management, and SEO Management.

This guide walks you through each part of the Developer Portal section.


1. Analytics

This is the default landing tab when accessing the Developer Portal section.

Features:

  1. Displays aggregated analytics data across all developer portal pages.
  2. Includes key metrics:
  • Users
  • Sessions
  • Views

2. Settings

Provides global configuration options that affect all developer portal pages.

Includes:

  • Theme Selector – Choose a unified theme for all portals.
  • Default Dark Theme Toggle – Set a global dark mode as the default experience.

3. Branding & Logo Logic

While not a separate tab, logo handling follows a clear display logic:

  • If no logo is uploaded in the Developer Portal section: → The system uses the logo from Branding settings.
  • If a logo is uploaded in Developer Portal settings: → That logo is displayed across all developer portal pages.

4. Custom Domain

Manage custom domain configuration for your developer portals.Note: Custom domain settings are global and apply to all portal pages — individual pages cannot have separate custom domains.

Note: Custom domain settings are global and apply to all portal pages — individual pages cannot have separate custom domains.


5. Page Management

Create and manage individual developer portal pages from this section.

Creating a Page:

Click the “Add New Page” button. A modal will appear with the following required fields:

  • Page Name
  • Slug
  • Template Selector (choose from predefined templates)

Managing Existing Pages:

All created pages are listed with the following options:

  1. Edit (Update name and slug)
  2. More Actions (⋮ menu):
  • Go to Editor
  • Visit Published View
  • Duplicate Page
  • Delete Page

6. SEO Management

Each developer portal page can have its own SEO configuration to enhance search engine visibility.

Editable Fields:

  • Meta Title
  • Meta Description
  • Focus Keywords

These settings help optimize how your pages appear in search engines like Google.

Was this section helpful?

What made this section unhelpful for you?

On this page
  • Developer Portal Dashboard & Page Management

Project Management

On this page
  • Project Management

Workspace Configuration

What are Workspaces?

Workspaces in Theneo are distinct areas within the platform designed to manage different projects or teams under one umbrella organization. They serve as separate containers that allow for distinct management of APIs, documentation, and team access. Each workspace can have its own branding, permissions, and configurations, making it an ideal solution for companies with multiple products or teams.

Benefits of Using Workspaces:

  1. Team Management:
    • Allocate specific workspaces to different teams within the organization.
    • Set permissions and roles to control access and maintain security.
  2. Brand Consistency:
    • Customize branding for each workspace to align with the product or team identity.
    • Manage multiple branding configurations without affecting other workspaces.
  3. Organized Documentation:
    • Keep documentation for different products or APIs separate and organized.
    • Provide tailored information relevant to the users of each workspace.
  4. Targeted Landing Pages:
    • Design and use different landing pages for each workspace to cater to the specific audience or user base.
    • Enhance user experience by directing them to the relevant workspace right from the start.

When are Multiple Workspaces Relevant?

  • Multiple Products: If your company offers a range of products, each with its own set of APIs and documentation, separate workspaces allow for tailored content management without overlap.
  • Distinct Branding: Companies that operate different brands under one corporation can use workspaces to manage and present APIs in line with each brand’s guidelines.
  • Team-Specific Access: For organizations with several engineering teams, each responsible for different APIs, workspaces provide a way to segment API ownership and control who has access to what.
  • Project Phases: During different stages of development, such as testing and production, workspaces can be used to segregate and manage these environments effectively.

Implementing Workspaces:

  • Setup: Administrators can create and configure workspaces from the Theneo dashboard.
  • Customization: Each workspace can be customized with its own branding and landing pages.
  • Access Control: Assign team members to workspaces and define their roles and permissions.
  • Content Management: Develop and maintain API documentation that's specific to the needs of each workspace.

In summary, workspaces in Theneo provide a powerful means to segment and manage your API documentation and teams. They offer the flexibility to support multiple products, brands, and teams within a single platform, ensuring that each can operate with its required level of autonomy and specificity

On this page
  • Workspace Configuration